Configuration & Settings
Overview
The Configuration & Settings page is one of the most important parts of the system, as it is responsible for customizing the work environment within the system to fully align with each company's policies and regulations.
Each company differs in its work system, types of leave, shifts, accounting methods, payroll rules, and human resources procedures. Therefore, it is essential to adjust the settings before starting to use the system.
Before starting to use the system in practice, every company must go through all configuration menus and adjust them to match their officially adopted policies, as the system relies completely on these settings in all daily operations.
Why Should Every Company Configure Settings?
- For the system to work according to each company's internal policies: Each company has different rules for leave, attendance, advances, salaries, shifts, and more.
- Ensure accuracy of calculations within the system: Such as payroll calculations, deductions, bonuses, overtime, absence days, etc.
- Organize workflow: Configuring leave types, request types, shifts, and documents makes the experience clear and organized for employees and managers.
- Ensure all features work correctly: Notifications – Email – Activity monitoring – Attendance – Approvals – Performance.
First: Attendance
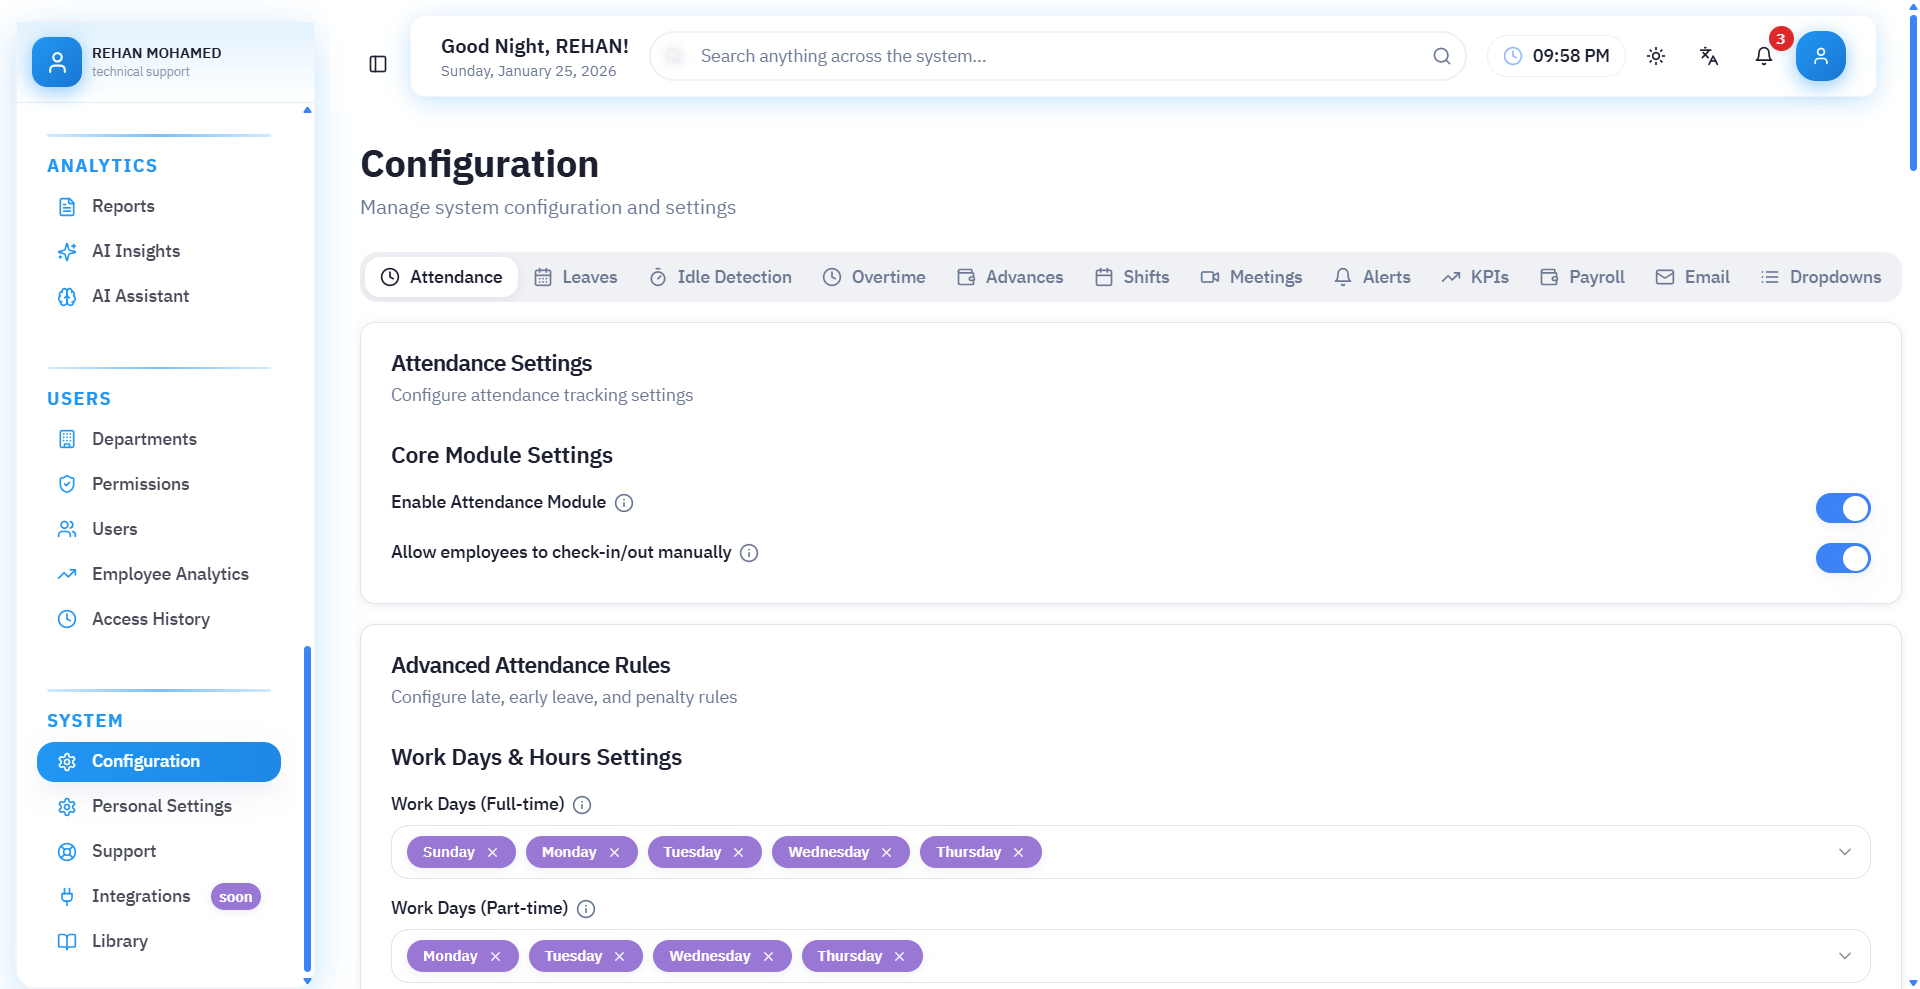
First: Basic Attendance Settings
This section is dedicated to activating the attendance and departure system and defining the basic features of the system.
1. Activate Attendance System
Allows the system to start recording employee attendance according to the specified settings.
2. Allow Manual Registration
Gives employees or supervisors the ability to record attendance manually (in case of no fingerprint device or technical issue).
Second: Advanced Attendance Rules
This section is for adjusting rules for delays, early departure, penalties, and violations.
Third: Work Days and Hours Settings
This section is responsible for determining:
1. Work Days (Full-time)
Determining the days on which employees work full-time.
Example: Saturday – Monday – Tuesday – Thursday
2. Work Days (Part-time)
Determining additional days on which the employee works part-time (if any).
Default Work Hours
The basic work schedule is determined for all employees in the organization, and can be customized later for each employee.
- Default Work Start Time (Full-time): Example: 08:00 AM
- Default Work End Time (Full-time): Example: 04:00 PM
- Default Work Start Time (Part-time): Example: 09:00 AM
- Default Work End Time (Part-time): Example: 01:00 PM
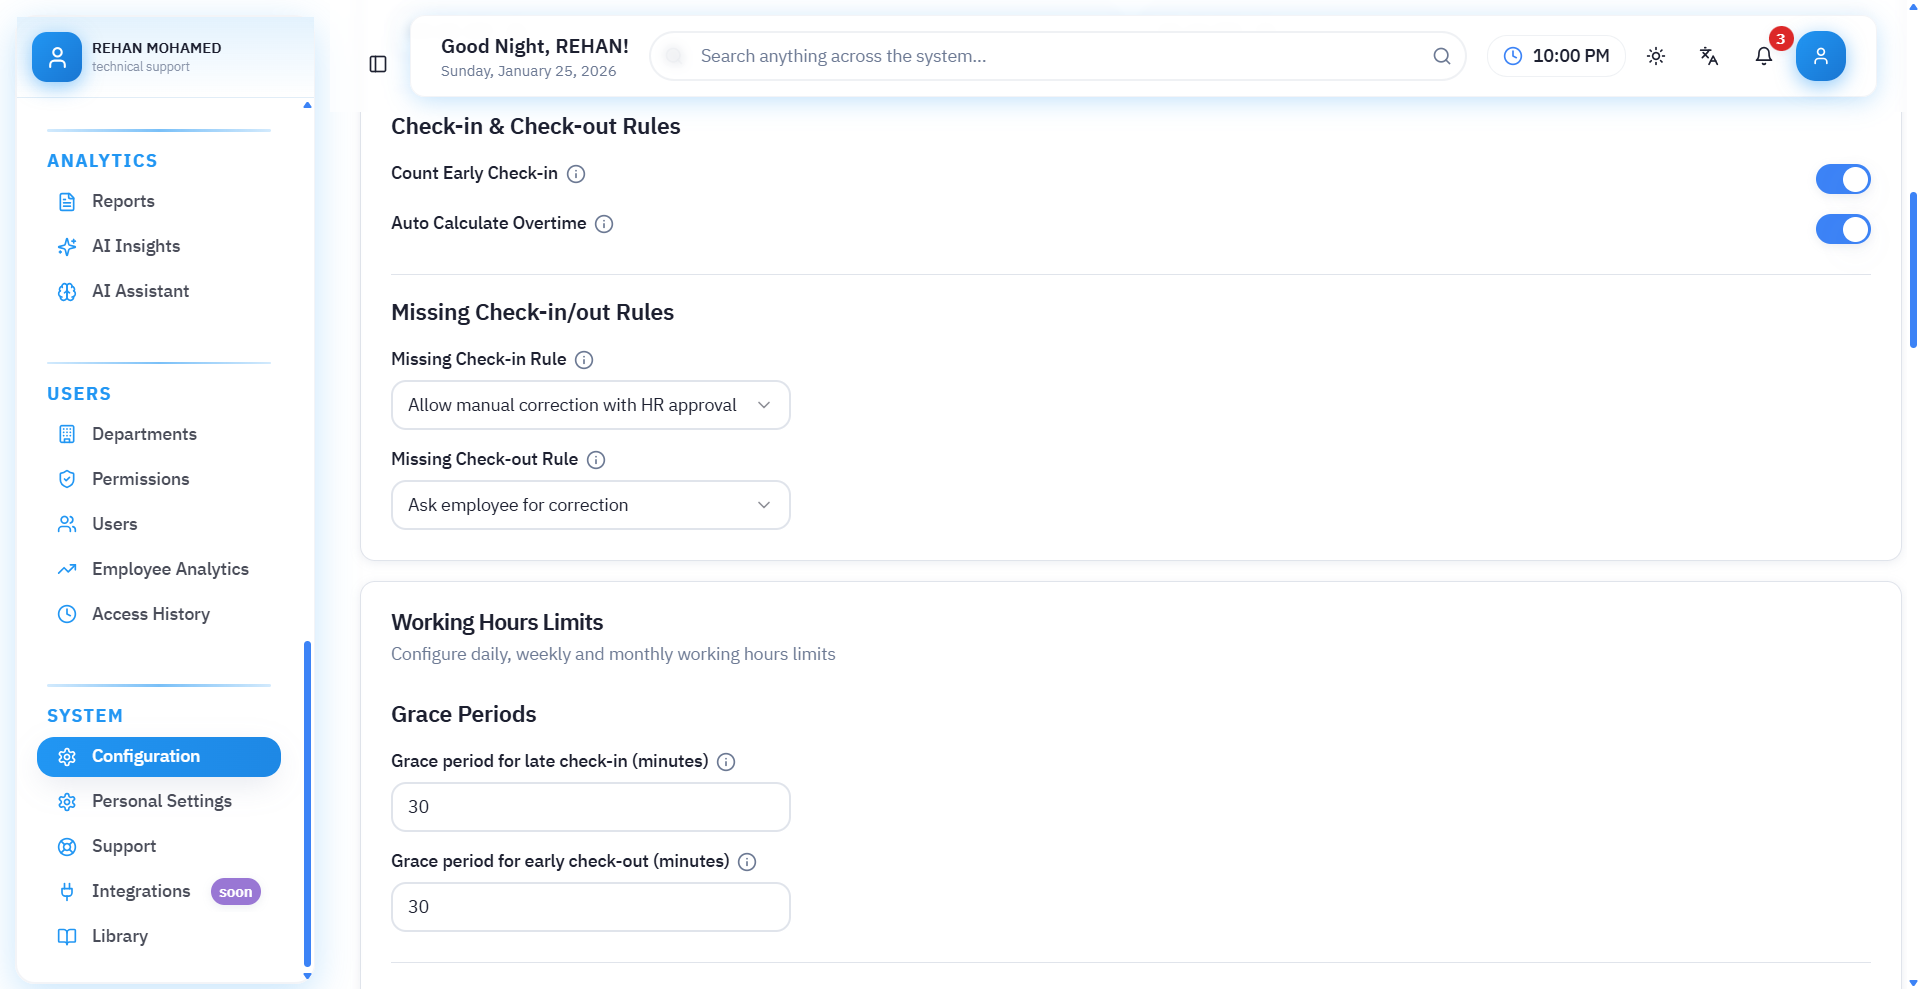
First: Check-in and Check-out Rules
This section determines how the system handles attendance and departure recording.
1. Calculate Early Check-in
If enabled, the system calculates early arrival time before the scheduled work start time.
2. Automatically Calculate Overtime
When this option is enabled, the system automatically calculates extra hours if the employee leaves after the official time.
Second: Missing Record Rules
This section handles cases where the employee forgets to check in or check out.
1. Missing Check-in Rule
Choose the appropriate action when an employee does not check in, such as:
- Warning to employee
- Apply deduction
- Ignore record
2. Alert Employee to Check-in
The system automatically sends an alert to the employee when they forget to check in.
3. Missing Check-out Rule
Determine what happens when an employee does not check out:
- Automatically adopt last work time
- Apply deduction
- Alert supervisor
4. Alert When Auto-confirming Check-out
Sends a notification to the employee that the system has automatically calculated their check-out (without the employee recording it).
Third: Work Hours Limits
Used to adjust daily, weekly, and monthly official work hours for employees.
Grace Periods
These are the minutes allowed before considering an employee late or early:
-
Grace Period for Late Check-in (minutes): The duration during which an employee is allowed to be late without counting as a violation.
- Example: 10 minutes = if they arrive at 8:10, they won't be counted as late.
-
Grace Period for Early Departure (minutes): The duration during which an employee is allowed to leave before the official time without counting as a deduction.
- Example: 20 minutes = leaving at 3:40 instead of 4:00 is not considered early departure.
- Example: 20 minutes = leaving at 3:40 instead of 4:00 is not considered early departure.
Daily – Weekly – Monthly Work Hours
This section determines the number of hours required from the employee to work according to work type (full-time or part-time), so the system can:
- Calculate delays
- Calculate early departure
- Determine compliance rate
- Calculate actual work hours
- Calculate overtime or shortage
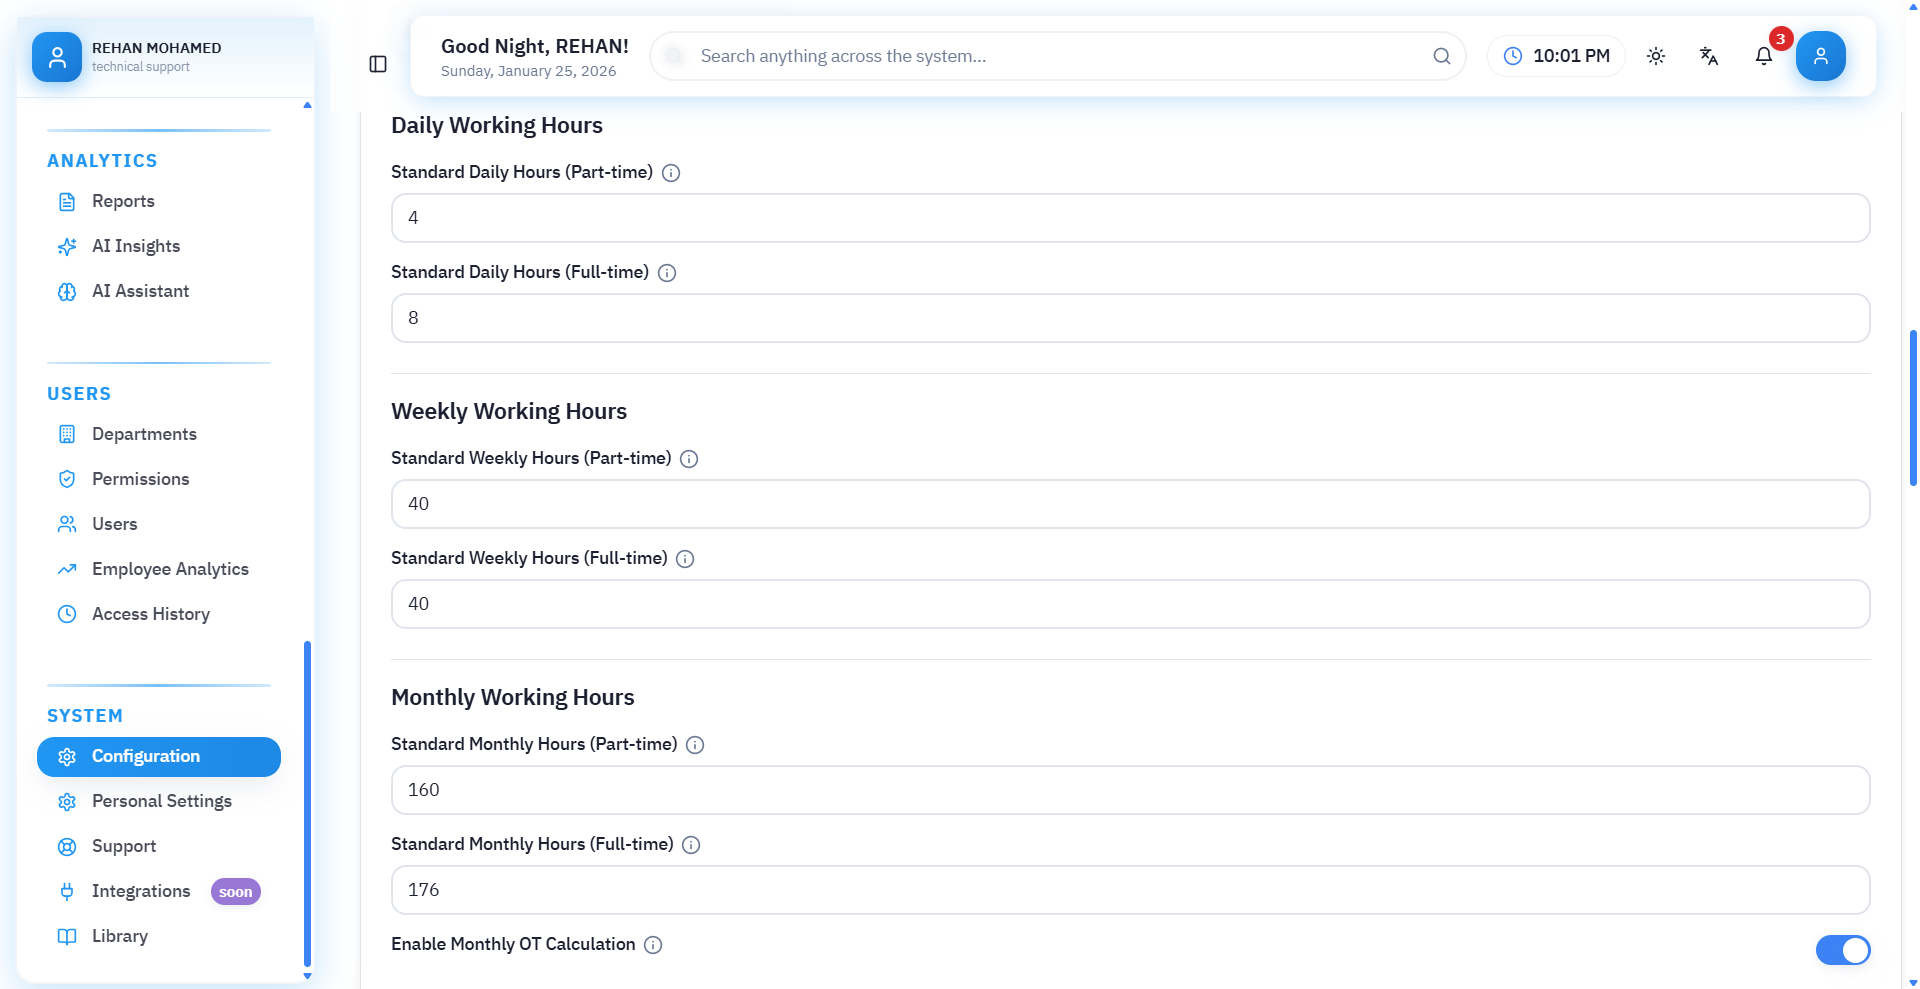
1. Daily Working Hours
Here the number of official hours that the employee must work daily is determined.
- Standard Daily Hours (Part-time): Example: 4 hours - means part-time employee is required 4 hours daily only.
- Standard Daily Hours (Full-time): Example: 8 hours - means full-time employee is required 8 hours daily.
2. Weekly Working Hours
The system collects daily work hours and calculates weekly hours from them, but you can set them manually to adjust rules.
- Standard Weekly Hours (Part-time): Example: 20 hours per week - if part-time employee works 4 days × 5 hours = 20 hours
- Standard Weekly Hours (Full-time): Example: 40 hours per week - (5 days × 8 hours)
3. Monthly Working Hours
These hours are used for:
-
Performance evaluation
-
Absence calculation
-
Ensuring completion of required monthly hours
-
Linking work hours to salaries if the company system adopts it
-
Standard Monthly Hours (Part-time): Example: 130 hours per month - depends on number of work days in the month.
-
Standard Monthly Hours (Full-time): Example: 192 hours - (24 days × 8 hours)
Because the system uses them for:
- Detecting any shortage in hours
- Calculating delays and early departure
- Determining completion rate of required hours
- Calculating overtime hours
- Adjusting reports accurately
- Preventing payroll errors
First: Automatic Compliance Rules
These rules are used to manage employee compliance with required work hours and alert management when there is a shortage or issue.
1. Alert on Low Daily Hours
The system sends an alert if the employee does not achieve the required number of hours during the day.
Example: Employee required 8 hours → worked 6 → system sends alert.
2. Alert on Low Weekly Hours
If the employee does not complete the total required weekly hours, an alert appears for management or employee.
3. Alert on Low Monthly Hours
Special alert for not completing the minimum monthly work hours.
Example: Monthly limit = 192 hours - Employee completed 175 hours → alert appears.
4. Prevent Overtime Calculation if Hours Not Completed
A strong feature to prevent manipulation:
- If employee did not complete daily/weekly/monthly hours
- System does not calculate any overtime (Overtime) until requirements are met first.
5. Enable Break Tracking
Allows the system to record and calculate break duration during work.
6. Maximum Break Duration (minutes)
Determining the number of break minutes allowed.
Example: 45 minutes → if employee exceeds 45 minutes, delay or deduction is automatically calculated according to company policy.
Second: Automatic Location-based Attendance (Geofencing)
A very important feature for employees who use mobile phones to record attendance.
What is Geofencing?
It is defining a geographical area (company location), so that:
- Employee cannot record attendance unless they are within the specified location
- Recording attendance from home or places outside the company is prevented
- System automatically recognizes employee entry or exit from the location
What Does This Setting Do?
- Automatically records attendance and departure when employee enters or leaves the location
- Ensures accuracy of actual employee presence
- Prevents attendance fraud from outside the location
Activation Button
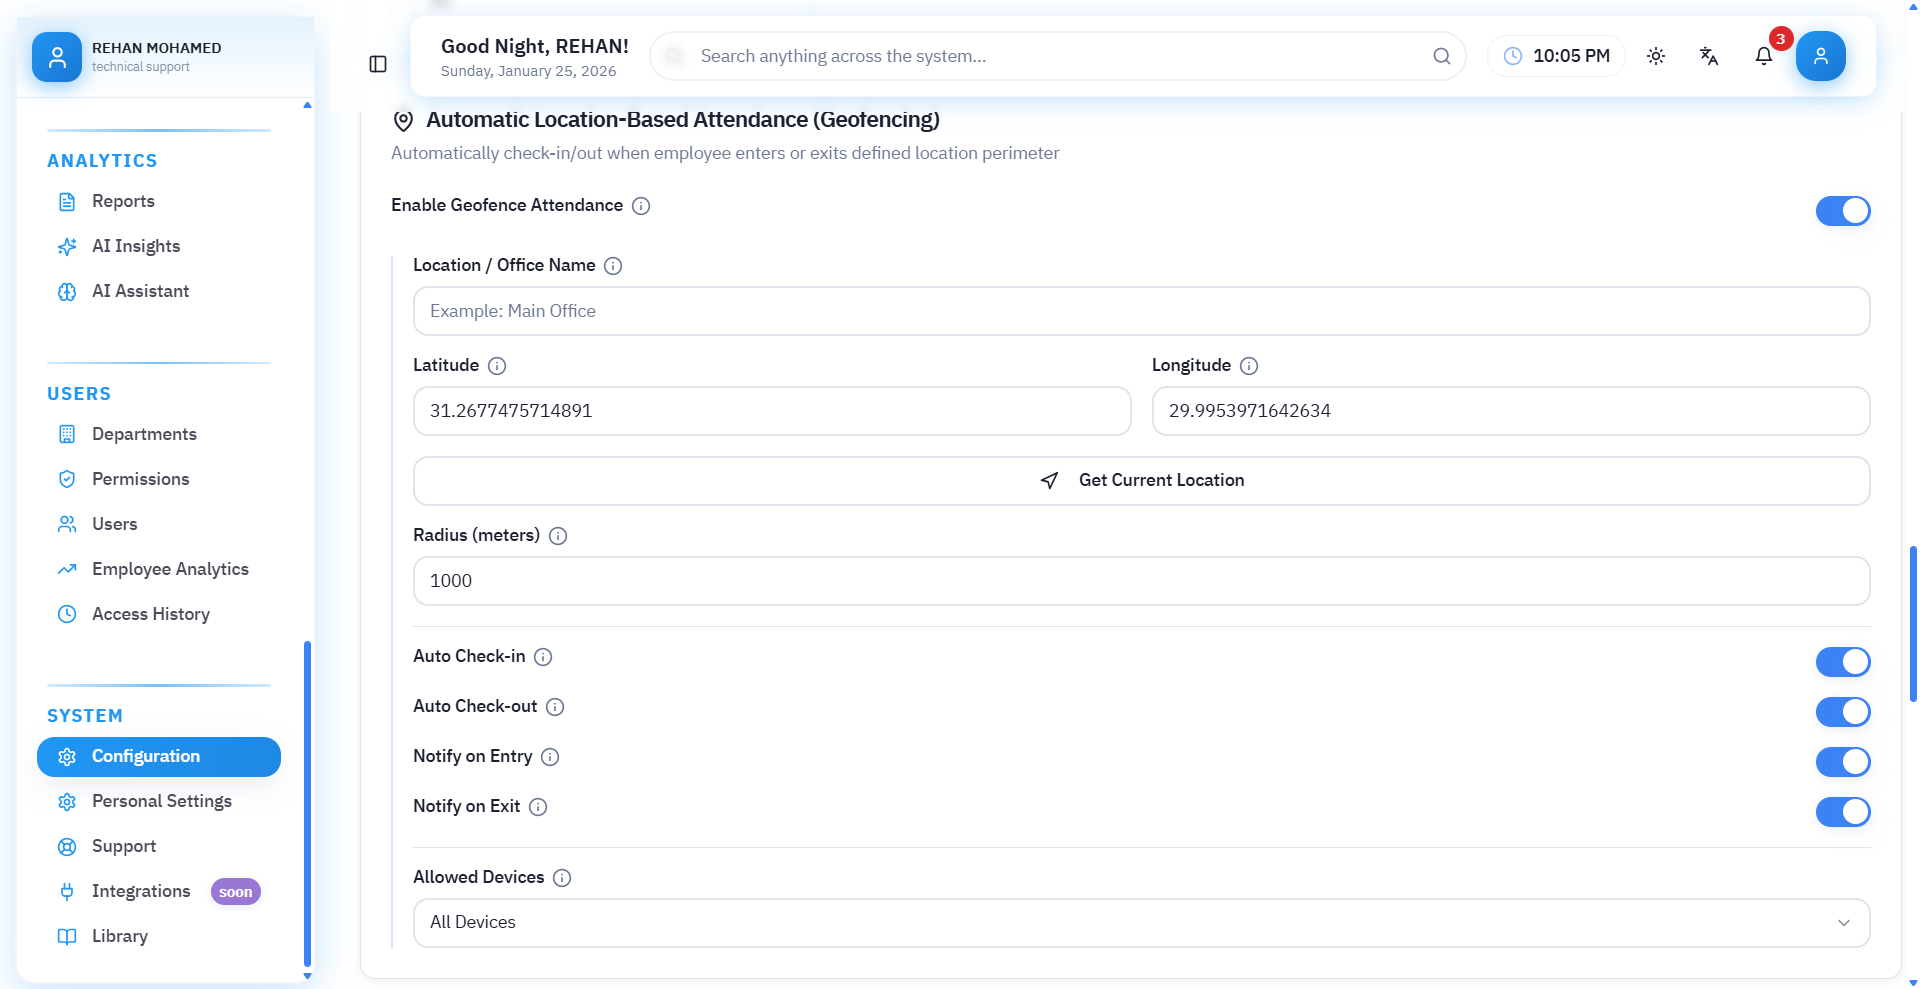
"Activate Location-based Attendance" - When activated, the system begins applying geographical location rules.
Biometric Device Integration
This section is dedicated to linking the attendance and departure system with the biometric device (Fingerprint / Face ID) so that check-in and check-out operations are sent directly to the system and recorded automatically.
1. Activate Biometric Device Link
When this option is enabled:
- System begins receiving attendance data from the biometric device.
- Check-in and check-out are automatically recorded the moment they occur on the device.
2. Device Type
Here you choose the type of biometric device used.
Example: ZKTeco - the most common in companies.
The system supports different types, and data is sent for each type according to its protocol.
3. API Link (for Device Settings Input)
This link is the point through which the system receives biometric data.
You copy and paste it into the biometric device settings itself.
Its function:
- Receive check-in and check-out
- Process events
- Link each fingerprint to the correct employee
4. Authentication Token (Auth Token)
This is a secret code used to confirm that data is coming from a trusted device.
It is entered into the device to ensure:
- Prevent receiving fake data
- Protect the link from any unauthorized external party
Example: BIO_XP613HIS586SL8P3VKJ35UO2Y26wKDT
5. Sync Frequency
Determining the speed of data transmission from device to system.
Options usually:
- Real-time: Instant
- Every 1 minute
- Every 5 minutes
- Every 10 minutes
In real-time mode: Employee record appears as soon as fingerprint is touched.
6. Employee Mapping Method
The system needs to know: which fingerprint belongs to which employee?
Linking is done in two ways:
- Employee Code: Links fingerprint to employee's internal number.
- Fingerprint ID: Each employee has a dedicated number within the device.
7. Setup Instructions
This is an instructional section that explains step-by-step how to configure the device, usually including:
- Copy API link to device settings.
- Place Auth Token in authentication field.
- Ensure device is connected to internet.
- Enable event transmission from device.
- Test connection to ensure data is received.
8. Connection Test
A button used to verify:
- Device is connected to system
- Link is correct
- Token is correct
- System is receiving data successfully
If connection successful → success notification appears. If failed → reason for failure appears.
First: Weekly Rest Days
This section is used to determine the days that are considered weekly holidays for employees.
Select Weekly Rest Days
You can specify one or more days such as:
- Friday
- Saturday
- Or any other day according to company system.
These days are excluded from:
- Work hours calculation
- Delays
- Absence
Calculate Work on Rest Days as Overtime
When this option is enabled:
- Any employee working on their rest day is automatically recorded as Overtime.
Example: Friday is a holiday → if employee records Friday attendance = overtime hours.
Second: Official Holidays
This section allows adding annual official holidays such as:
- Eid al-Fitr
- Eid al-Adha
- National Day
- New Year
- Special occasions for the company's country
Holidays List
Displays all holidays added to the system.
Currently shows message: "No holidays added"
"Add Holiday" Button
When clicked, you can enter:
- Holiday name
- Start date
- End date
- Whether it's paid or not
These days are excluded from official work hours.
Calculate Work on Holidays as Overtime
If this option is enabled:
- Any attendance recorded during an official holiday is automatically calculated as overtime (Overtime).
Example: If holiday day is a holiday → and employee records attendance → system calculates hours as Overtime.
Second: Leave
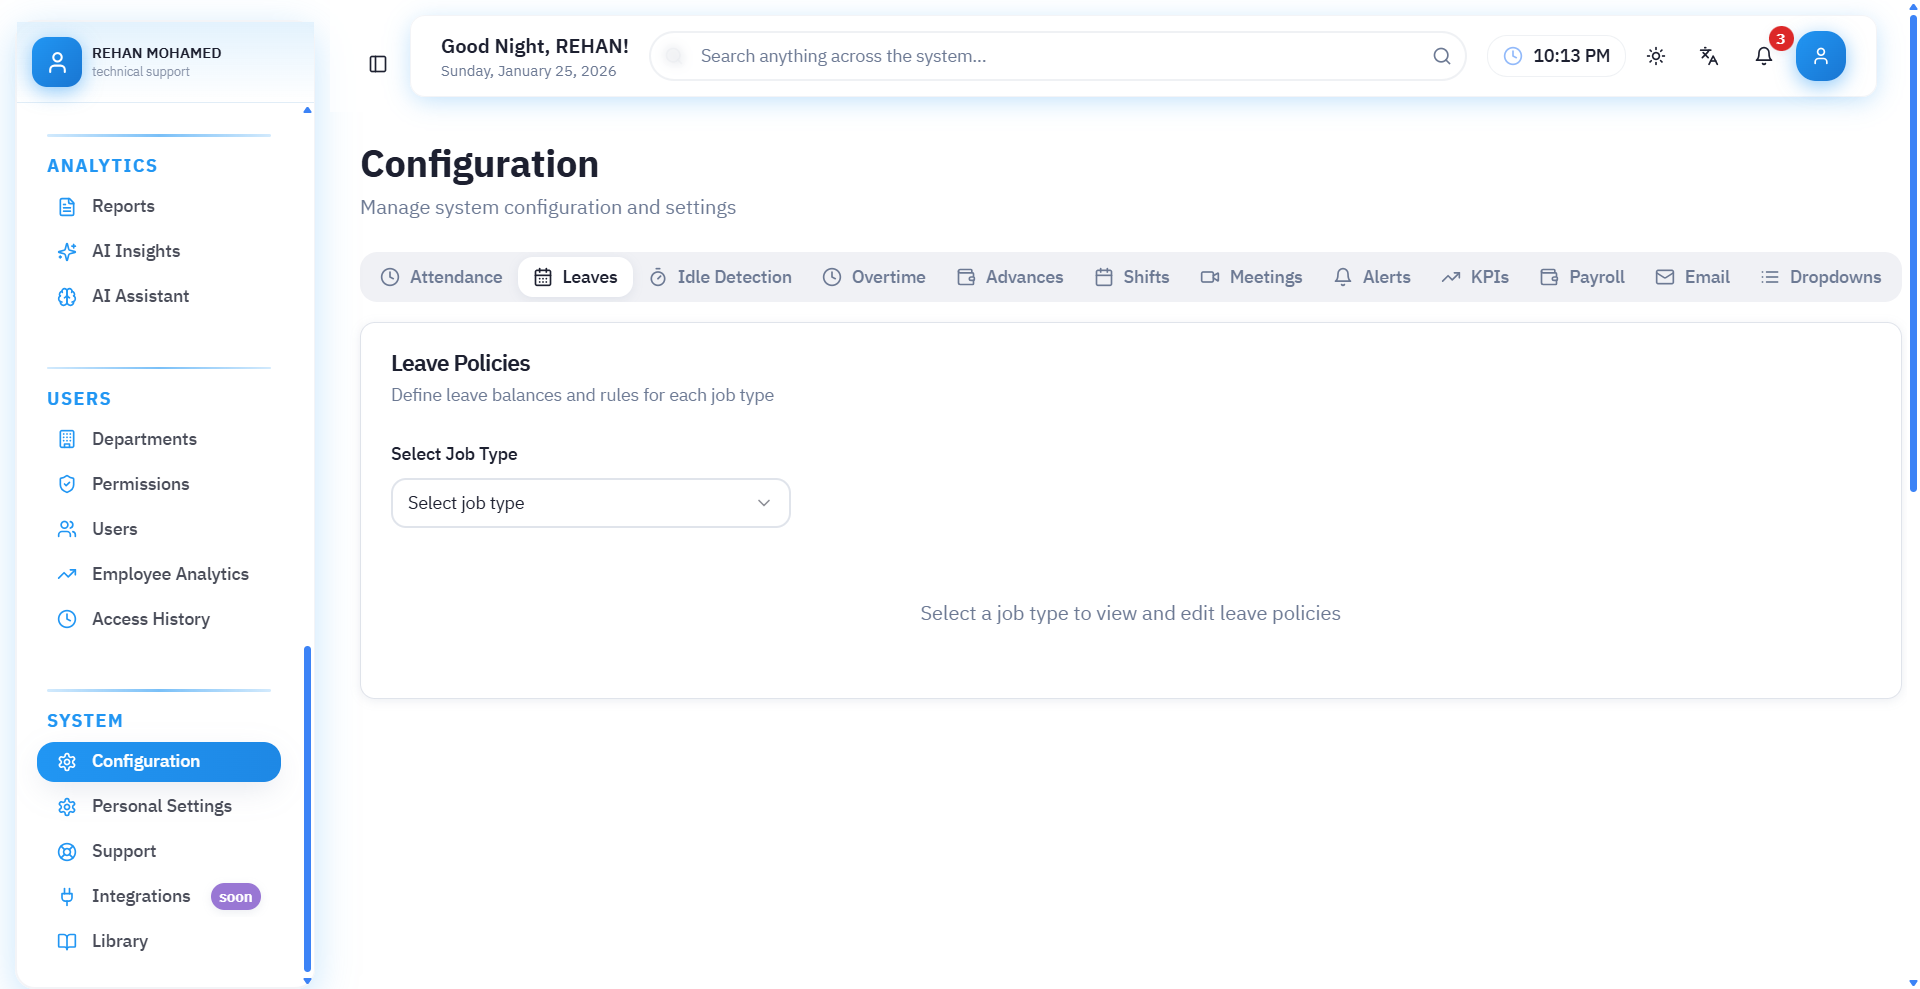
Leave Policies
This page is used to determine leave policies and types within the company for each job or job category.
The system allows creating different rules for each leave type and automatically applying them to employees.
1. Select Job Type
At the top of the page there is a selection: Select Job Type (Full-time – Part-time – …)
Meaning: Each job may have different leave policies.
For example:
- Full-time employee → 30 days annual
- Part-time employee → only 10 days
After selecting the job, leave types specific to it appear.
2. Leave Types Table
Each row in the table represents a specific leave type such as:
- Permission
- Annual leave
- Sick leave
- Emergency leave
- Unpaid leave
- Maternity leave
- etc.
Each type has a set of settings:
3. Explanation of Leave Table Columns
Balance (Days)
Number of days allowed annually for this leave type.
Example:
- Annual leave → 30 days
- Sick leave → 10 days
- Emergency leave → 12 days
Hours/Month
If the leave type is calculated in hours rather than days.
Example: Permission = 4 hours monthly
Paid
If option is enabled → leave is calculated as paid and not deducted from salary.
Example:
- Annual leave – Sick leave – Emergency leave → paid
- Unpaid leave → not paid
Maximum Consecutive
Maximum number of days that can be taken at once.
Example:
- Emergency leave → maximum = 2 days
- Annual leave → no limit (marked with "-")
Attachment Required
Does this leave require an attachment such as:
- Medical report
- Official document
- Signed permission
Example:
- Sick leave → ❗ Must have attachment
- Annual leave → no attachment needed
Advance Notice (Days Notice)
Number of days the request must be submitted before.
Example:
- Annual leave → 2 days advance notice
- Emergency leave → 0 days (accepted immediately)
Accrual
If enabled → leave accumulates from year to year.
Example: Annual leave balance is carried forward to next year if not used.
Accrual Years
Number of years in which balance can be carried forward.
Example: 2 years → balance can be carried forward for only two years.
4. Importance of This Page
The system uses these settings to:
- Automatically calculate leave balance
- Accept or reject requests based on rules
- Know if leave is paid or unpaid
- Determine if employee needs attachment
- Prevent exceeding maximum limit
- Automatically create balance each month/year according to policy
The leave policies page is used to determine leave types and their rules for each job, including number of days, whether paid, attachment requirements, consecutive limit, accrual policies, and advance notice. The system automatically applies these policies when a leave request is submitted.
There is an additional step that must be done before configuring any new leave policy, which is adding it first through the Lists menu.
Go to: Lists ← Select Category (Leave Types) ← Then add the leave type you want.
After saving the new type, it will automatically appear in the leave policies page, and from there you can configure its rules, set its balance and conditions according to company policy.
Third: Activity Monitoring
Activity Monitoring and Automatic Logout System
This system aims to monitor user activity within the platform (employee or supervisor), and ensure they are actually working, not just having the system open without interaction.
In case of no activity for a specified period, the system alerts the user or automatically logs them out.
1. Activate Activity Monitoring System
When this option is enabled:
- System begins monitoring user movement within the platform
- Such as navigating between pages, clicking, typing, saving
- In case of no activity, the specified action is taken
2. Inactivity Duration
The period after which an employee is considered "inactive".
Example: If set to 2 hours → employee did not click or interact for 2 hours → system warns or logs them out.
Available units:
- Hours
- Minutes
- Seconds
3. Advance Warning Time
The time before automatic logout is executed.
Example: Warning time = 3 minutes - means 3 minutes before user logout, a warning message appears.
4. Response Grace Period
The duration during which the user is allowed to confirm they are still working.
Example: Response grace period = 2 minutes - during this minute if they click "Yes, I'm here" → logout is cancelled.
5. Warning Message
The message that appears to the user before automatic logout.
Example as in image: "No activity detected for a while, are you still working?"
Can be modified to any text that suits the company.
6. Audio Alert
When this option is enabled:
- An alert sound is played for the user when the "Are you still working?" message appears
- To ensure the user notices the alert even if not looking at the screen
7. Automatic Logout Action
When the response grace period ends and employee does not interact, the system executes the following action:
Lock Session and Require Re-login
Means:
- User is logged out of their account
- They are required to enter password again
- System data is protected from unauthorized use
8. Excluded Roles
Some users can be specified who are not subject to automatic logout system.
Such as:
- General Manager
- Technical Support
- Auditors
- Human Resources employees
Reason: Their work requires keeping the system open for long periods without activity.
The activity monitoring system tracks user movement within the system, alerts them when inactive, and executes automatic logout after a specified period to maintain account security. Inactivity duration, warning message, and response time can be customized, with some roles excluded from this action.
Fourth: Overtime

Overtime Rates (Overtime Settings)
This page is used to adjust financial policies for overtime and determine how extra hours are calculated on regular days, night shifts, weekends, and official holidays.
1. Maximum Daily (hours)
Represents the maximum number of overtime hours an employee can get in one day.
Example: 6 hours → even if employee worked 10 overtime hours, only 6 hours are calculated.
2. Maximum Monthly (hours)
Maximum number of hours allowed during the entire month.
Example: 160 hours → system does not calculate any overtime hours after this limit.
This feature is important to prevent exceeding salary costs and government policies in some countries.
3. Regular Overtime Rate
The rate at which overtime is calculated on regular days.
Example: 1.25x (25% increase)
Means: If hour = 20 SAR → overtime hour = 20 × 1.25 = 25 SAR
4. Night Overtime Rate
Used when employee works during night according to company policy (e.g., 10 PM – 6 AM).
Example: 1.5x → 50% increase
5. Weekend Overtime Rate
Hours worked on Friday or Saturday can be calculated at a higher rate.
Example: 3x → employee gets 3 times their wage per hour.
6. Public Holidays Overtime Rate
Work on official occasions is calculated at the highest rate.
Example: 3x → wage is tripled.
This complies with policies in many countries (Saudi Arabia – UAE – Egypt).
How Does the System Use These Settings?
The system automatically:
- Distinguishes between regular / night / weekend / official holiday time
- Calculates hours based on actual attendance and departure time
- Multiplies hours by the rate specified on this page
- Adds them to payroll automatically
- Prevents exceeding daily or monthly limits
Fifth: Advances

Advances Settings
This page in WARED HR system is responsible for determining the maximum monthly advance an employee can get, based on a percentage of basic salary.
1. Activate Advances Policy
When this option is enabled:
- System begins applying advance rules automatically
- Prevents employee from requesting an advance greater than allowed limit
- Advance is calculated based on the specified formula
2. Maximum Advance (% of Monthly Basic Salary)
Here the percentage allowed from basic salary that employee can take as advance is determined.
Example in image: 20%
Means: If basic salary = 3000 SAR → Maximum advance = 20% × 3000 = 600 SAR
3. Calculation Method (Explanation)
The system explains in detail how advance calculation is done, and shows 4 different methods depending on company policy:
- Method 1: Percentage × Basic Salary
- Method 2: (Percentage × Basic Salary) ÷ Monthly Work Hours × 4
- Method 3: (Percentage × Basic Salary) ÷ Monthly Work Days × 4
- Method 4: (Percentage × Basic Salary) ÷ Monthly Work Hours
Method selection depends on:
- How salaries are calculated in the company
- Is salary linked to hours?
- Or to days?
- Or fixed monthly?
4. Illustrative Example
If employee earns 500 SAR daily, and official work days are 22 days, then maximum monthly advance = 20% × (500 × 22) = 2,200 SAR.
The system provides this example to clarify the concept for users.
This section allows determining the maximum advance percentage allowed for employee from their basic salary, and the system automatically calculates the amount according to company policy whether it depends on days, work hours, or monthly salary. The system also prevents employee from requesting an advance that exceeds the specified limit.
Sixth: Shifts
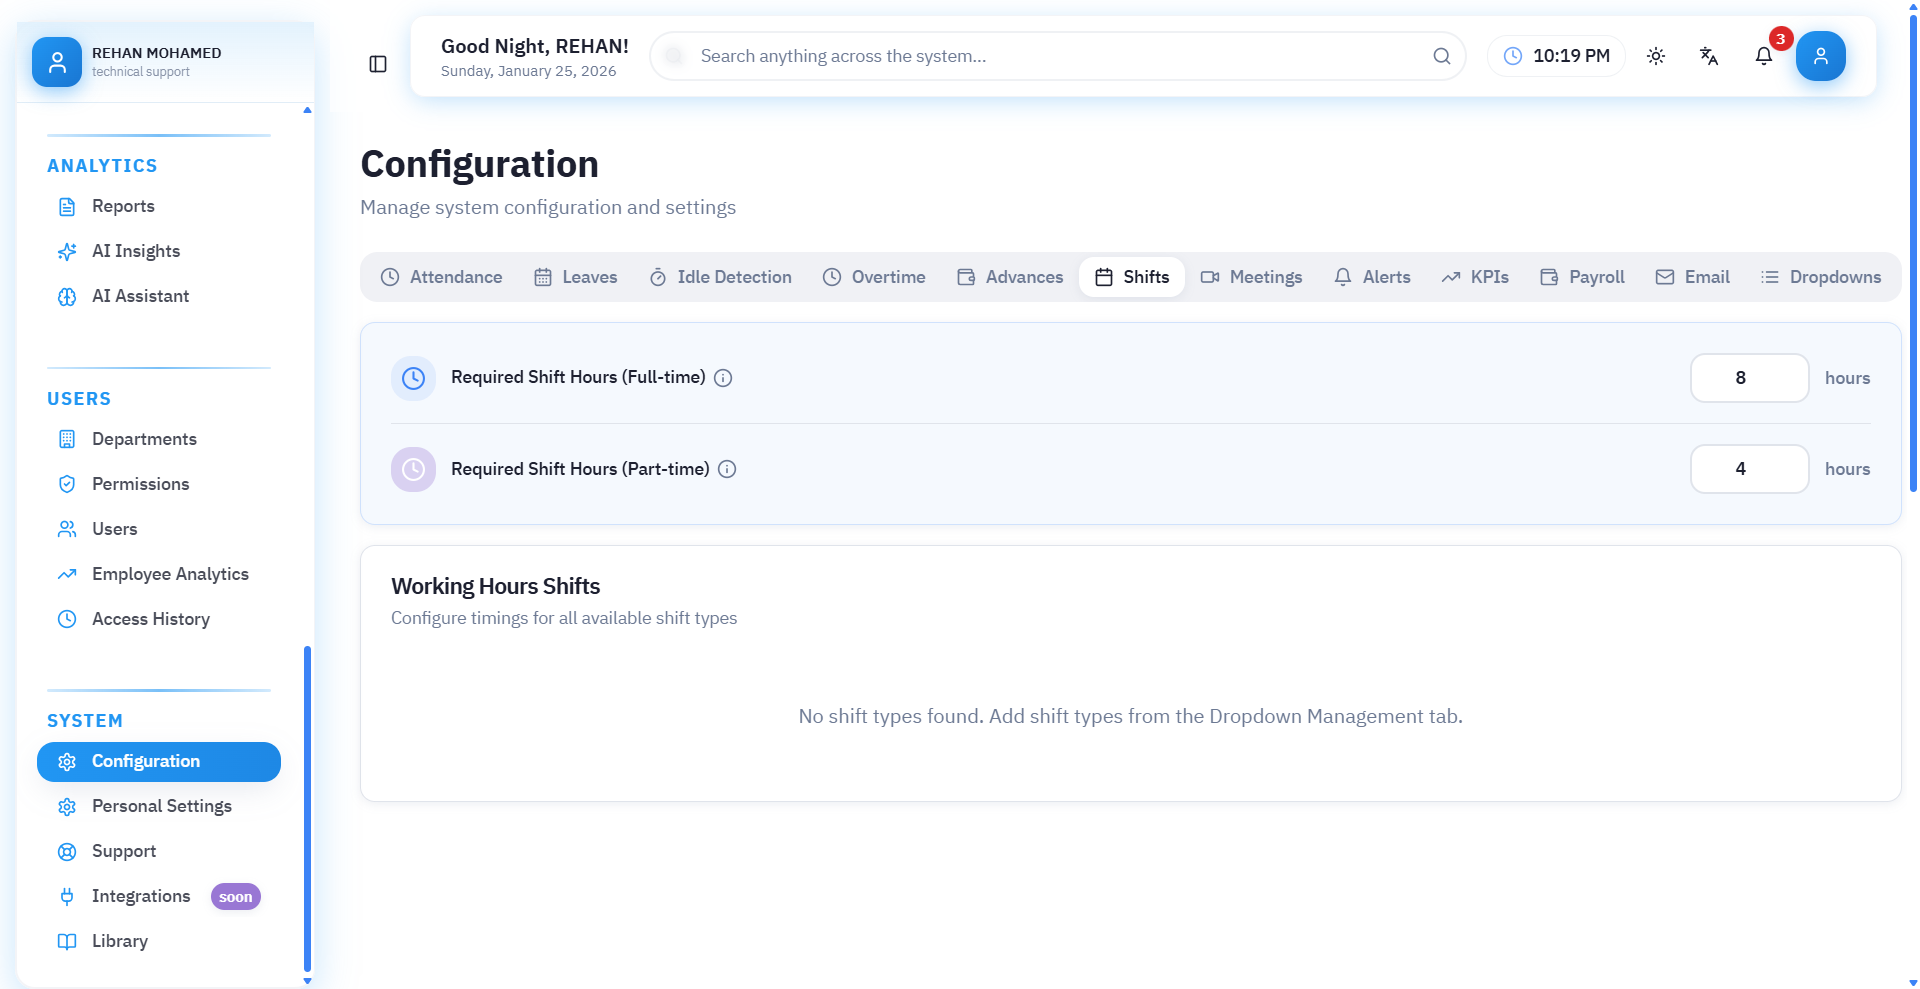
Shifts Types Page Explanation
This page is used to manage "shift types" within the system, and is an essential step before creating work schedules or configuring employee attendance.
The page allows adding, modifying, enabling or disabling shift types that the company uses.
1. Select Category (from Lists)
At the top of the page, select: Lists ← Shift Types
This category displays all shifts registered in the system.
2. "Add New Value" Button
When this button is clicked, you can add a new shift in terms of:
- Name (Morning – Evening – Night – Flexible – Split...)
- Value used within the system
- Color (Color Tag) for distinction in tables
- Order
- Status (Enabled / Disabled)
After adding, the shift will appear in the shifts table to be used later in:
- Work schedules
- Attendance settings
- Employee settings
- Shift reports
3. Shift Types Table
Each row represents a specific shift and contains the following fields:
Order
The order in which shifts appear in lists, such as: 1 – Morning 2 – Evening 3 – Night 4 – Flexible 5 – Split
Value
This is the internal system value used programmatically.
Example:
- morning
- evening
- night
- flexible
- split
Display Name
The name visible to users in the interface.
Such as:
- Morning shift
- Evening shift
- Night shift
- Flexible shift
- Split shift
Color
A distinctive color that appears with shift type in tables and reports for quick identification.
Status
- Enabled → Shift is available for use
- Disabled → Does not appear in settings or when adding employee
Actions
Contains:
- ✏ Edit shift
- ❌ Delete shift (if not in use)
Why Is This Page Important?
Because shift types are used directly in:
- Determining employee shifts
- Attendance and departure settings
- Work hours calculation
- Overtime (OT) according to shift type
- Weekly and monthly work schedules
- Work reports
Without setting up shifts first, the attendance system will not work correctly.
There is an additional step that must be done before using shifts within the system, which is adding them first through the Lists menu.
Go to: Lists → Select Category (Shift Types) → Then click "Add New Value" to add the shift you want to use.
After saving the shift, it will appear directly in shift settings and can be linked to employees or work schedule.
Seventh: Meetings

Meeting Settings
This page allows you to configure how the system handles meetings, whether in terms of notifications, automatic reminders, or tracking invitees.
1. Notify Invitees When Creating Meeting
When this option is enabled, the system automatically sends a notification to all employees who were invited immediately upon creating the meeting.
✔ Useful to ensure everyone is notified without needing to send manual messages.
2. Send Automatic Reminder
When this option is enabled, the system will send a reminder to invitees before the meeting time by a specified period.
✔ Helps reduce delays or forgetting appointments.
3. Default Reminder Time
Here you can specify the time period before which the automatic reminder is sent, such as:
- 10 minutes
- 30 minutes
- 1 hour
- 3 hours
- Full day
Example: If 30 minutes is selected, reminder will arrive half an hour before meeting time.
Eighth: Notifications

Notifications and Alerts Settings
This page allows you to control all notifications sent by the system to employees or HR administrators, whether related to attendance and departure or leave management.
(1) Attendance and Time Tracking Notifications
Attendance notifications are divided into two parts:
- Notifications for employees
- Notifications for manager/HR department
Employee Notifications
These notifications help employees track their attendance and departure accurately.
- Check-in Reminder (before shift start): System sends notification to employee before their shift starts to remind them to check in on time.
- Departure Request Status: Notification is sent to employee when departure request is responded to by management.
Manager / HR Notifications
Help manager track attendance and departure movement and take quick action when violations occur.
- Daily Attendance Summary: Manager receives a notification containing daily attendance summary (late arrivals – absences – incomplete records).
- Attendance Correction or Shift Evaluation Requests: Manager receives notifications when employee requests attendance modification or work day evaluation.
- Automatic Attendance Records for Inactivity: System sends notification to manager if automatic check-out was recorded for employee due to inactivity.
- Overtime Request Approval: Notification appears to manager when there are overtime hour requests from employees.
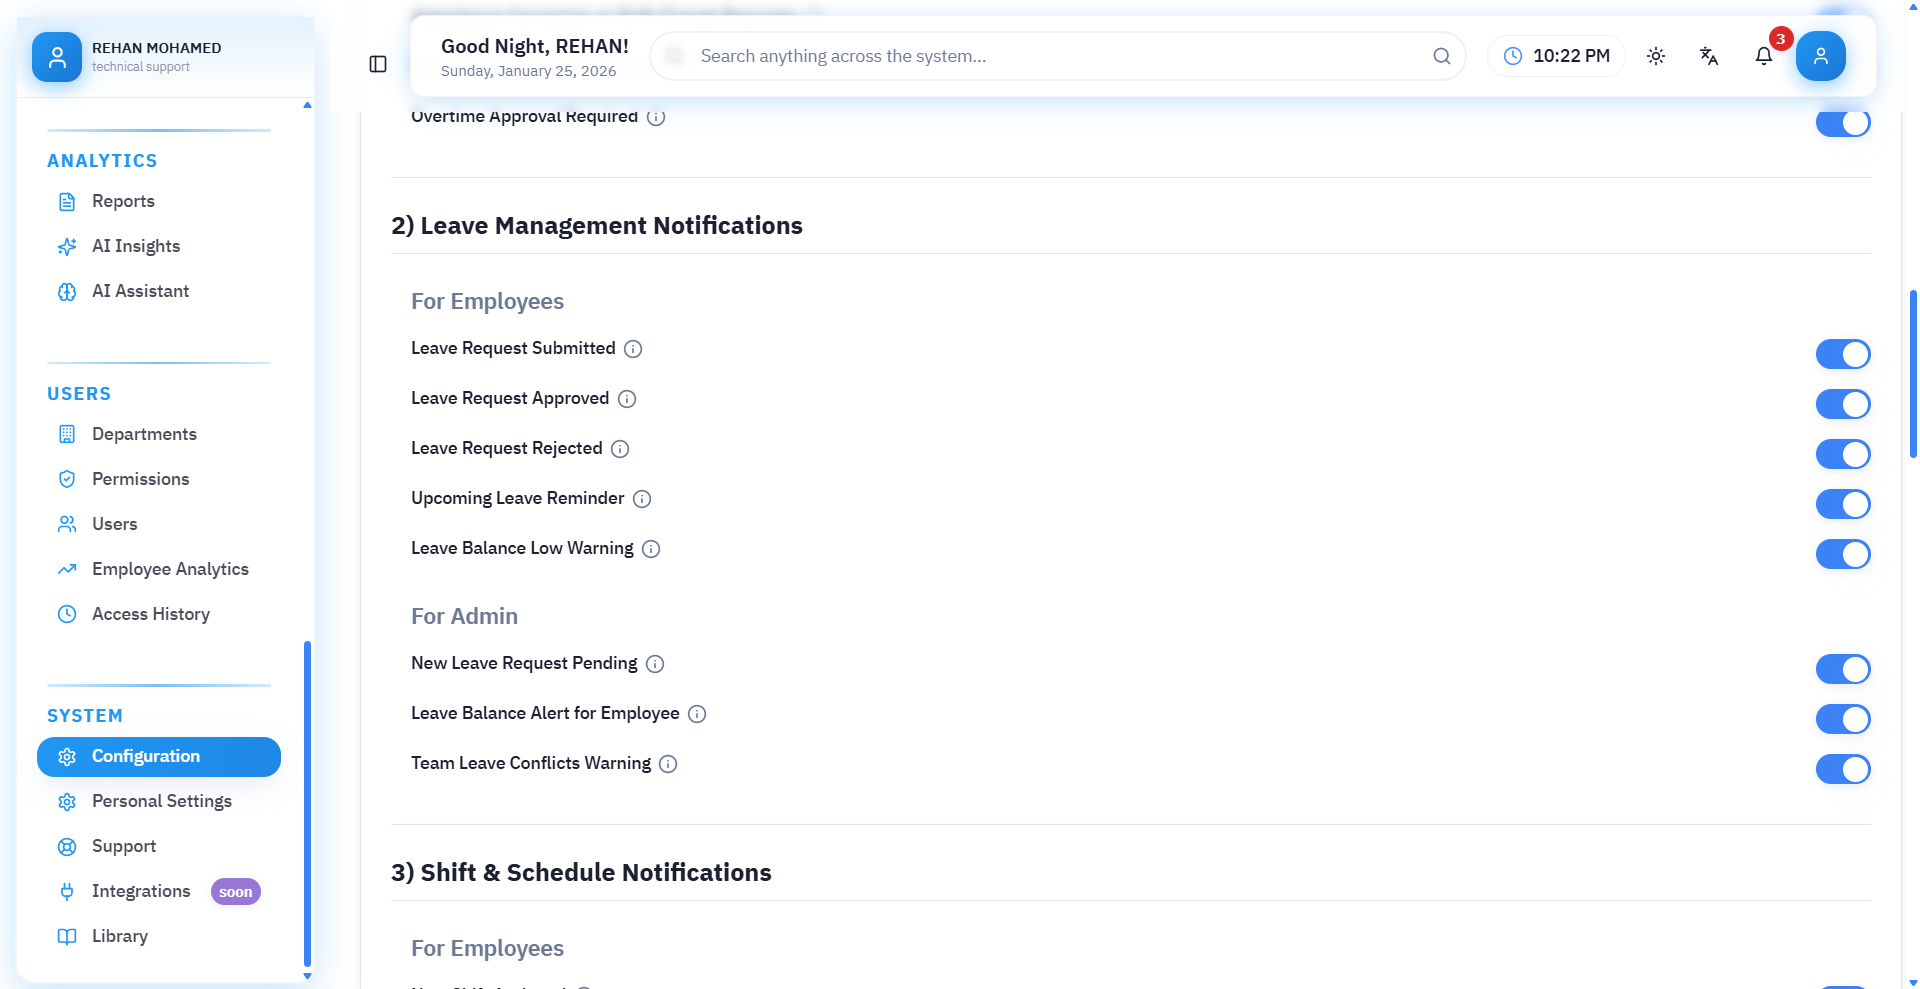
(2) Leave Management Notifications
These notifications explain everything related to leave requests for both employee and management.
Employee Notifications
- Leave Request Submitted: Employee receives notification confirming leave request was sent.
- Leave Request Approved: System sends notification when management approves the request.
- Leave Request Rejected: Notification is sent explaining rejection reason.
- Upcoming Leave Reminder: Before leave date, employee receives automatic reminder.
- Low Leave Balance Warning: System sends notification when leave balance approaches minimum.
Management Notifications
Help managers track all requests quickly.
- New Leave Request Pending: When any new leave request is submitted, notification appears to management for decision.
- Low Leave Balance Warning for Employee: System sends alert to manager when noticing low balance for an employee.
- Upcoming Leave Notification: Alert to management about approaching leave date for an employee to organize work.
(3) Shifts and Schedules Notifications
These notifications help track any changes or alerts related to daily work shifts, for both employees and management.
Employee Notifications
- New Shift Assigned: Employee receives notification immediately upon adding or changing their shift in schedule.
- Shift Change Notification: Employee is notified if management modifies their current shift times.
- Shift Cancellation: Employee is notified when their shift is deleted from approved schedule.
- Upcoming Shift Reminder (before start): System sends reminder to employee just before shift start to ensure punctuality.
Management Notifications
- Insufficient Employees in Shift Warning: Management receives alert if number of employees registered for shift is less than required.
- Shift Modification Request: Alert sent to manager when employee submits request to modify shift (time – date – shift type).
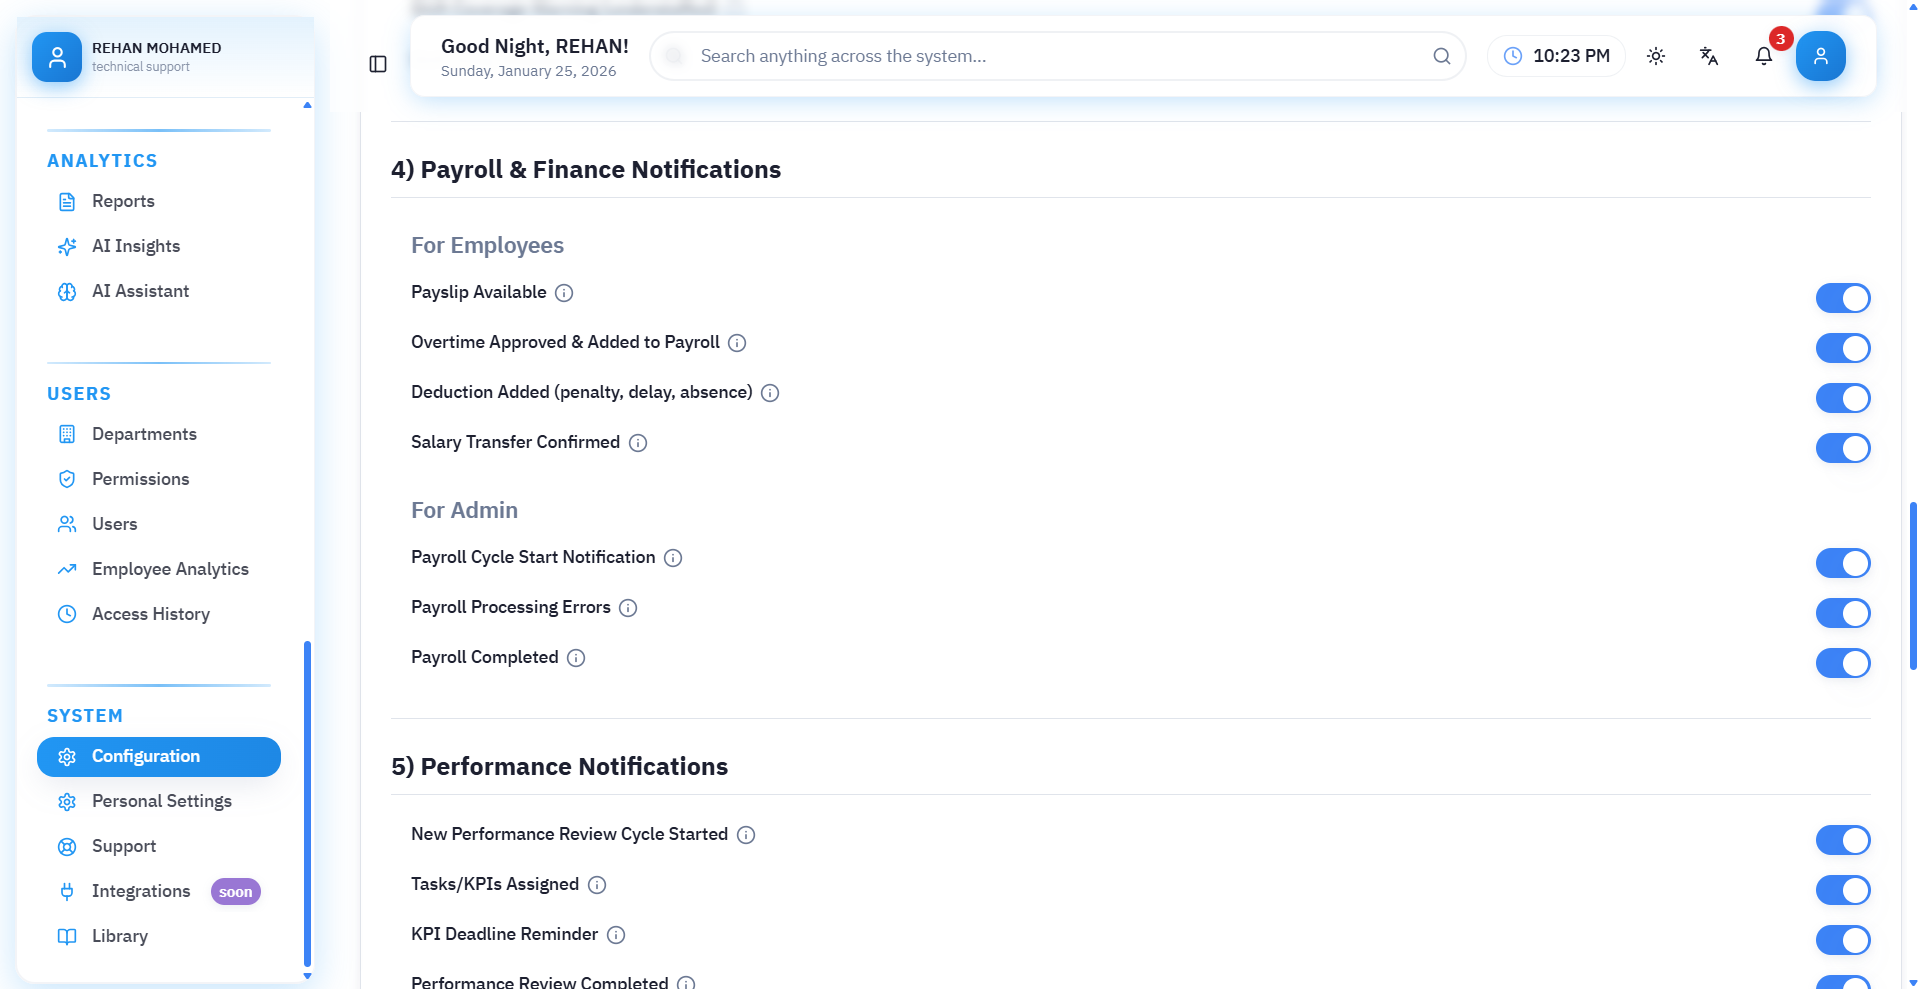
(4) Payroll and Financial Notifications
These notifications aim to inform employees and management about everything related to their salaries, deductions, bonuses, and monthly payment records.
Employee Notifications
- Payroll Slip Available: Employee receives notification when payroll slip is issued for current month.
- Overtime Approved in Payroll: Employee is notified when overtime hours are calculated and approved in payroll.
- Deduction Added (Delay / Absence): System alerts employee in case of new deduction on their salary.
- Bonus Added: Notification differs according to bonus type (fixed – performance-based – additional allowance).
Management Notifications
- Payroll Cycle Start: System alerts management that payroll preparation cycle has started.
- Payroll Files Ready for Review: Notification to management that payrolls are ready for audit and review before approval.
- Payroll Completion: Final notification arrives when payroll issuance is completed for all employees.
(5) Performance Notifications
These notifications help track employee performance evaluation cycles and alert management and employees to important dates.
Employee Notifications
- New Performance Evaluation Cycle Start: Notification sent to employee when new evaluation cycle starts within system.
- Tasks/Evaluation Required Alert: Employee is notified of evaluation that must be filled or responded to.
- Evaluation Date Reminder: Employee receives alert before final evaluation date.
- Performance Evaluation Completion: Notification when evaluation cycle ends and performance results are issued.
(6) End of Service / Contracts Notifications
These notifications are used to ensure tracking of expired contracts and end of service processes accurately without delay.
Employee Notifications
- Contract Expiration Reminder: Alerts employee that their employment contract is about to expire.
Management Notifications
- Employee Contract Expiration Alert: Notification to manager or HR administrator when contract expiration date approaches.
- End of Service Bonus Calculation Complete: Notification arrives to management when end of service bonus processing is complete and statement of entitlements is printed.
(7) Documents Notifications
These notifications aim to track expiration of official employee documents.
Management Notifications
- Document Expiration Alert: System displays notification when one of employee's documents is about to expire (ID – Residence – License – etc.).
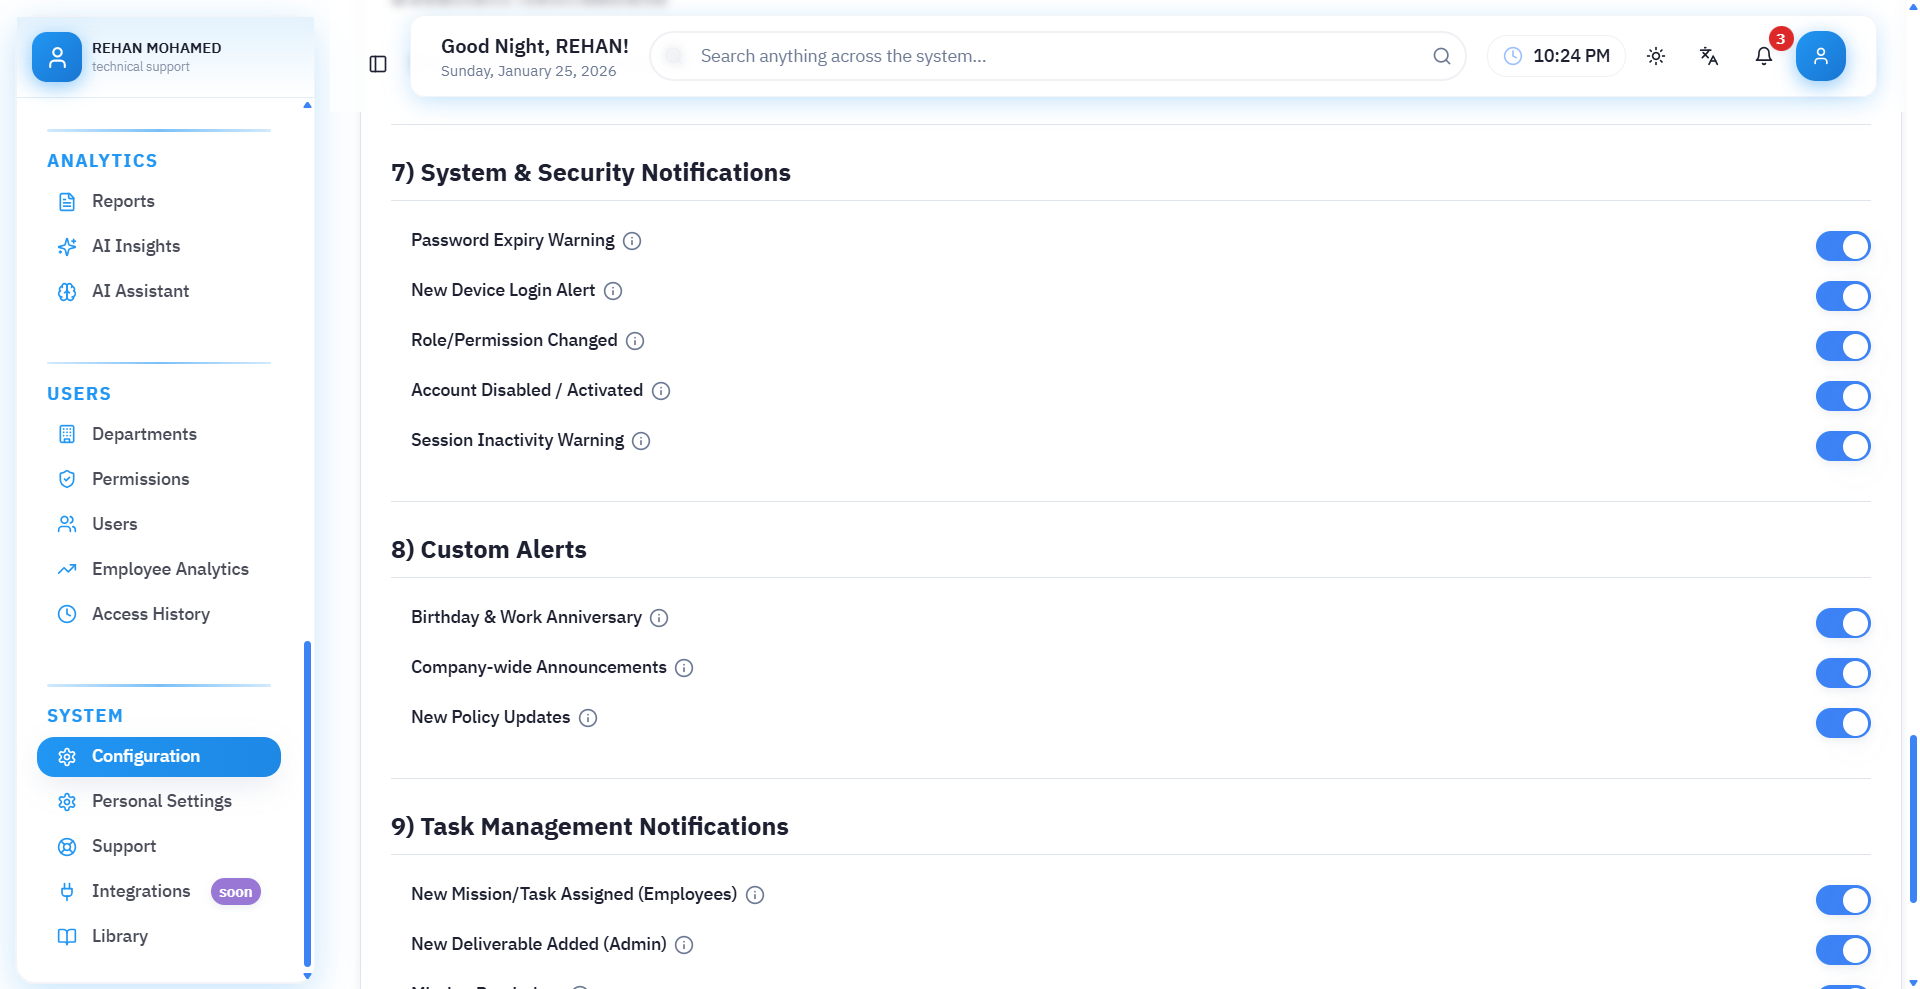
(8) System and Security Notifications
A set of notifications related to account security and login activity to protect company and employee data.
Employee Notifications
- Password Expiration Warning: Notification to employee when password expiration date approaches and update is necessary.
- Login from New Device Alert: Security notification arrives if login occurs from device not previously used.
- Password Change: Employee is notified when their password is modified.
- Account Enable/Disable: System alerts account owner when account is disabled or re-enabled.
Management Notifications
- Inactivity Alert: Notification to manager of accounts inactive for a long period.
(9) Custom Alerts
These settings allow sending general alerts and special occasions within the company to all employees.
Alert Types
- Birthdays and Work Anniversary: Notification automatically sent to employee or colleagues on employee's birthday or work anniversary.
- Company Announcements: Used to send general notifications when official announcement is published such as:
- Administrative updates
- Company news
- Internal events
- New Policy Updates: Employee receives notification when new policy is added or modified within system (such as HR regulations or attendance system).
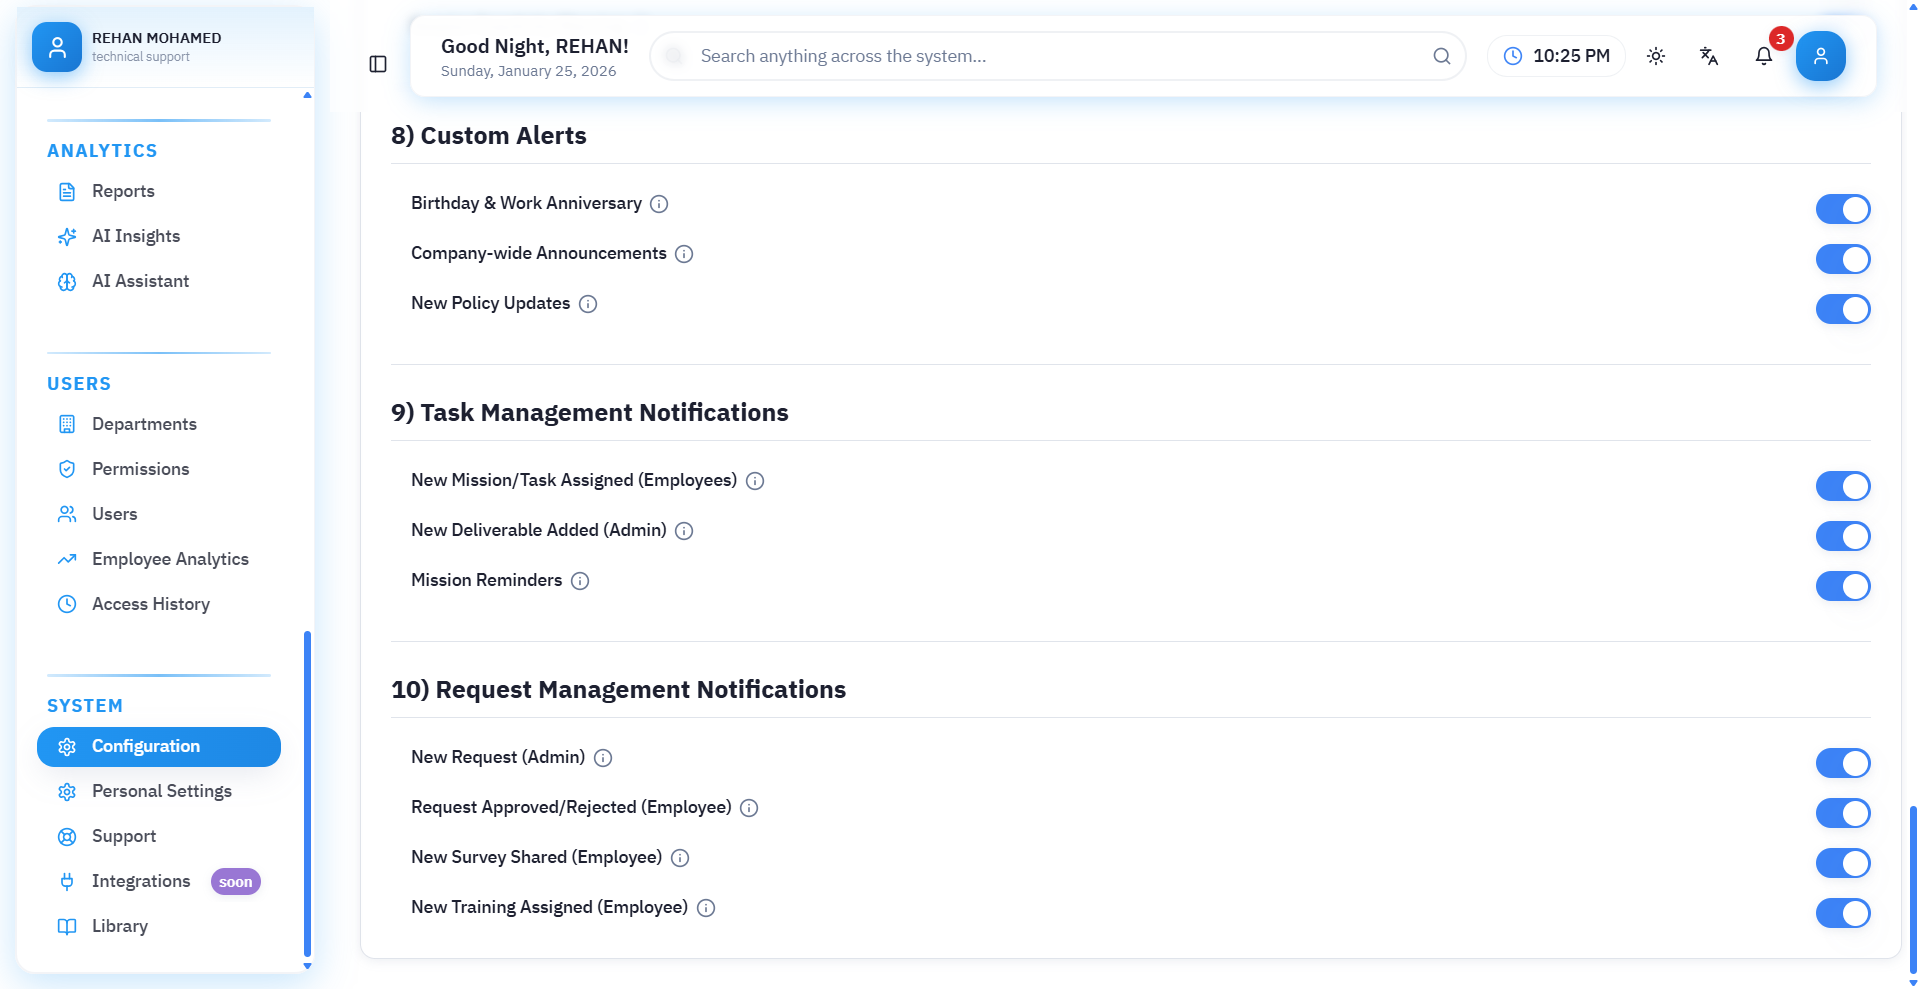
(10) Task Management Notifications
These notifications help employees and management track daily tasks easily and without delay.
Employee Notifications
- New Task: Employee is notified when assigned a new task within system.
Management Notifications
- Task Completion: Alert sent to manager when employee completes assigned task.
(11) Request Management Notifications
These notifications are used to track all types of requests (financial – administrative – human resources) within the company.
Management Notifications
- New Request: Manager receives notification when any new request is submitted by an employee.
Employee Notifications
- Request Approval or Rejection: Employee is immediately informed when:
- Request is approved
- Request is rejected
- New Participating Survey: Notification arrives to employee when they are included in a new survey within system.
- New Assigned Training: Employee is notified when new training course is assigned to them by management.
Ninth: Performance Indicators
Performance Indicators Settings
This page allows you to configure the employee performance evaluation system within the organization, whether through general company evaluation or performance indicators specific to each department.
First: General Performance Indicators Settings
1. Monthly Performance Evaluation
When this option is enabled, the system calculates a monthly performance score based on recorded data (attendance, achievement, punctuality, etc.).
✔ Useful for tracking employee performance continuously each month.
2. Productivity Tracking
When this setting is enabled, the system analyzes employee productivity in tasks, meetings, compliance, and other activities.
✔ Gives clearer picture of employee activity level during the period.
Second: Punctuality Calculation Settings
These settings control how the system calculates delay penalties.
Delay Penalty Multiplier
The number by which delay minutes are multiplied to calculate penalty value.
For example: If penalty is 20 and employee is 5 minutes late → penalty is calculated according to system formula and amount is automatically deducted from salary (if permissions are enabled).
✔ You can modify the number according to company policies.
Third: Department-based Performance Indicators Policies (KPIs Per Department)
This feature allows you to design performance indicators specific to each department so that sales department evaluation differs from customer service or technical support department.
How to Use:
- Select department from dropdown menu.
- Click add new indicator.
- Enter indicator name, description, and measurement method.
- System displays indicators within employee performance evaluation for this department.
If no department is selected, performance indicators cannot be added until a department is selected first.
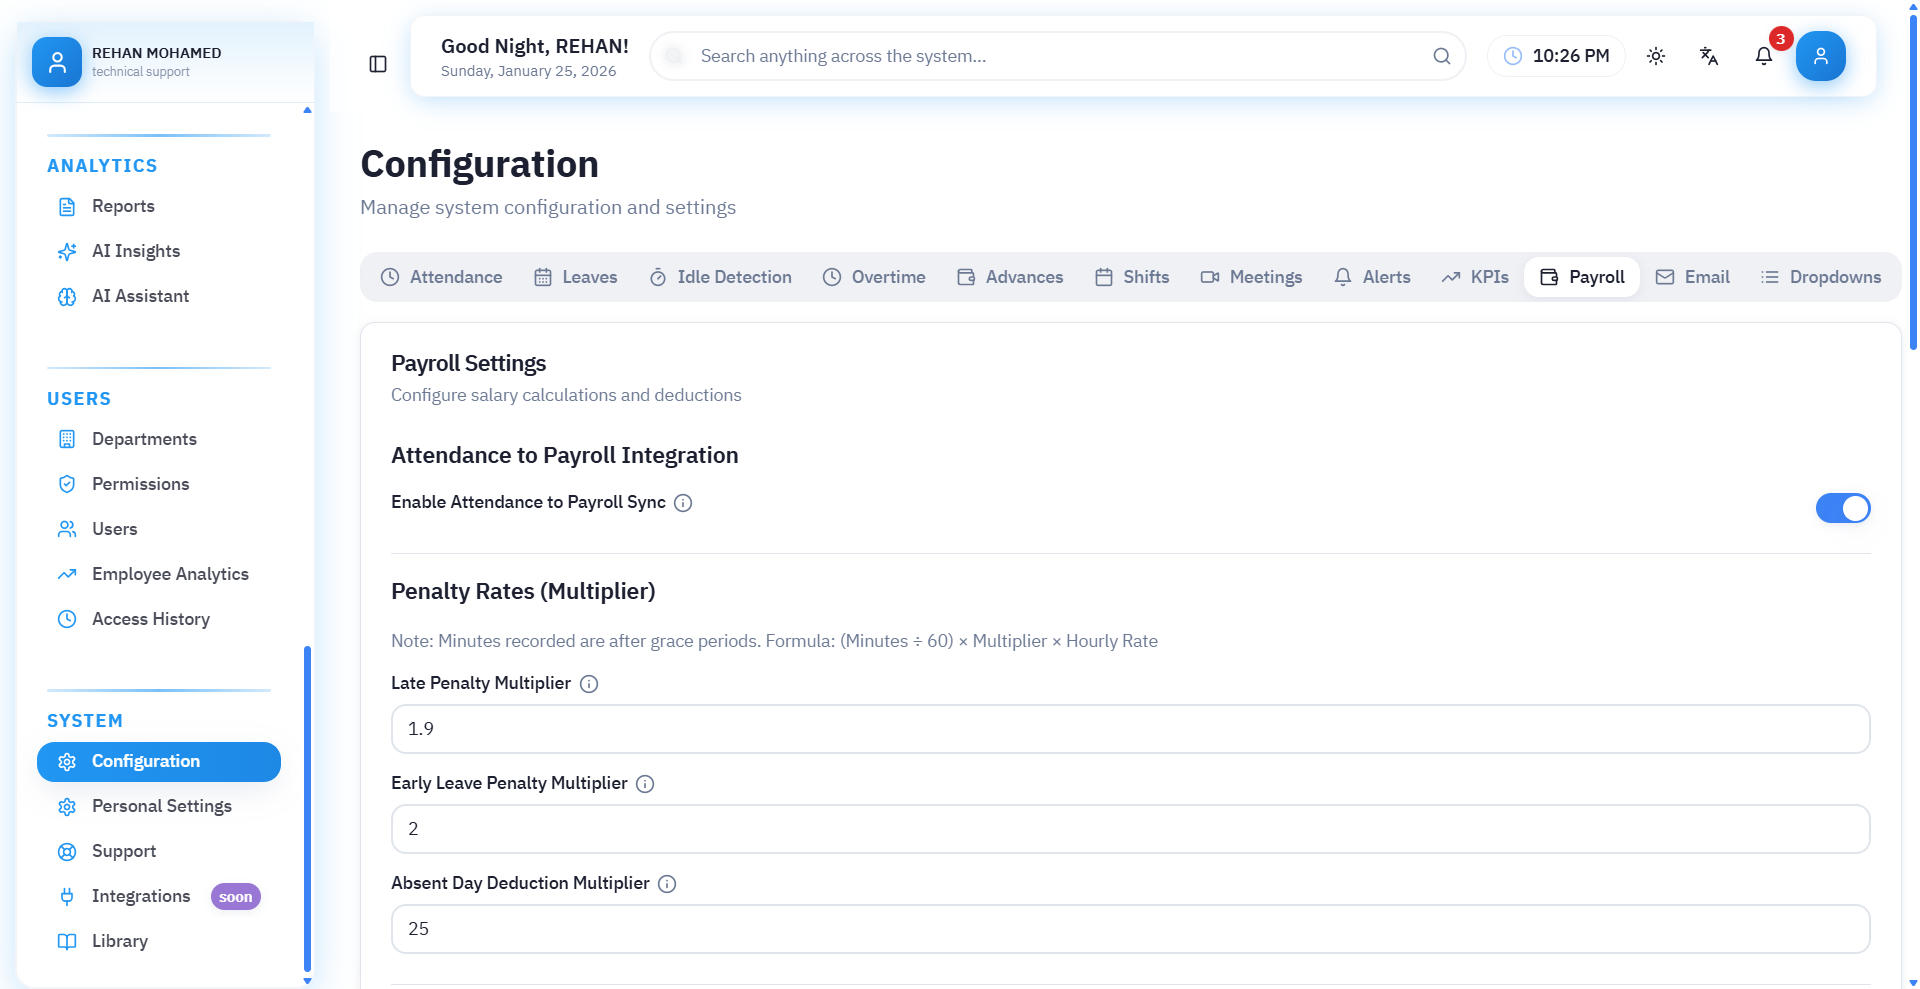
Tenth: Payroll
Payroll and Entitlements Configuration Page
This page allows configuring how the system handles deductions, bonuses, and payroll calculations based on employee attendance and discipline.
First: Link Attendance to Payroll
Enable Deductions Link to Payroll
When this option is enabled, delays, early departure, and absences are automatically deducted from employee salary according to rules specified below.
- ✔ System automatically calculates deduction
- ✔ Ensures fairness and accuracy of salary calculation
Second: Deduction Rates (Numerical Multiplier)
These inputs determine the multiplier value used when calculating deduction based on attendance status.
Deduction is calculated according to formula: Formula = (Minutes / 60) × Multiplier × Hourly Rate
1. Delay Deduction Multiplier
Value used to deduct delay minutes.
Example: If multiplier = 1.9 - means each delay minute is deducted at 1.9 times the normal minute value.
2. Early Departure Deduction Multiplier
Applied when employee leaves before end of shift.
Example: Value 2 means minute is calculated with 2× multiplier deduction.
3. Absence Day Deduction Multiplier
Multiplier used when employee is absent for a full day.
Example: 25 means deducting equivalent of 25 hours from employee salary or according to company method of calculating hourly rate.
Third: Automatic Calculation
Enable Automatic Deduction Calculation
Allows system to calculate daily deductions without manual intervention.
Enable Automatic Bonus Calculation
Gives system authority to calculate automatic bonuses based on performance, attendance, or company criteria.
Fourth: Bonus Settings
These options control the bonus system within the company.
1. Minimum Performance Percentage for Bonus (%)
Percentage that employee must achieve in monthly evaluation to be eligible for bonus.
Example: If value = 79% → employee gets bonus only if performance exceeds this percentage.
2. Bonus Percentage Per Performance Point (%)
Bonus is granted based on points achieved by employee.
Example: If value = 0.5 - each additional performance point grants 0.5% bonus.
3. Maximum Bonus
Highest limit employee can receive as bonus.
Example: If value = 17 → bonus cannot exceed 17% regardless of performance points.

Calculation Formulas Used
This page explains all formulas the system relies on when calculating deductions, bonuses, excess permission hours, and more, to ensure transparency and accurate understanding of how salaries are calculated.
1. Delay Deduction
Delay deduction is calculated based on actual delay minutes, deduction multiplier, and hourly rate.
Formula:
(Total Delay Minutes ÷ 60) × Delay Deduction Multiplier × Hourly Rate
Example:
- Delay: 15 minutes
- Deduction multiplier: 1.9
- Hourly rate: 20 SAR
- Deduction = (15 ÷ 60) × 1.9 × 20 = 9.5 SAR
2. Early Departure Deduction
Early departure is deducted using same method as delay with multiplier change.
Formula:
(Total Early Departure Minutes ÷ 60) × Early Departure Multiplier × Hourly Rate
3. Absence Deduction
System deducts value of one or more absence days based on employee salary and monthly work days.
Formula:
Number of Absence Days × (Basic Salary ÷ Number of Days in Month)
Example:
- Basic salary: 3000 SAR
- Days in month: 30 days
- Absence: 2 days
- Absence Deduction = 2 × (3000 ÷ 30) = 200 SAR
4. Excess Leave Deduction
If employee exceeds number of allowed leave days, excess is deducted from salary.
Formula:
Number of Excess Leave Days × (Basic Salary ÷ Number of Days in Month)
5. Excess Permission Hours Deduction
If employee exceeds number of allowed permission hours, excess is deducted.
Formula:
Excess Permission Hours ÷ 60 × Hourly Rate
6. Bonus Calculation
System uses clear formula to calculate bonus based on employee performance level.
Bonus Conditions:
- Bonus is calculated only if employee exceeds minimum required percentage.
- Bonus = Number of Points × Bonus Percentage Per Point.
- Cannot exceed maximum bonus.
- Bonus is calculated from basic salary.
General Formula:
Bonus = (Performance Points ÷ 100) × Basic Salary × Bonus Percentage
Complete Example:
- Employee achieved: 90%
- Minimum eligible percentage: 80%
- Basic salary: 10,000 SAR
- Bonus percentage: 10%
- Maximum: 20%
- Bonus = (90 ÷ 100) × 10,000 × 10% = 900 SAR
✔ As long as 900 is less than maximum (20%), bonus is applied as is.
Eleventh: Email

Email Templates
This page allows controlling email message settings that the system automatically sends to employees or management, aiming to improve communication and facilitate tracking of daily reports and alerts.
1. Email Notifications
When this option is enabled, the system automatically sends email alerts according to events related to employees, such as:
- Notification when new request is submitted
- Notification when approved or rejected
- Notification when any status related to employee is updated
- HR notifications to management
✔ It is preferable to enable this option to ensure updates reach all parties immediately.
2. Daily Report
When this option is enabled, the system sends a comprehensive daily summary via email at the end of each day containing:
- Today's requests
- Employee attendance and departure
- Notifications that were processed
- Completed tasks
- Any important updates that occurred during the day
This report helps management track work accurately without needing to access the system continuously.
3. Daily Report Send Time
Through this field, you can specify the appropriate time at which the system sends the daily report to the registered email.
Example: If time is set to 04:00 PM, daily report will arrive every day at 4 PM.
✨ Time can be adjusted to match end of employee shift or beginning of report review period.
Important Notes
- Email must be configured within the system to receive notifications without issues.
- Any option can be disabled if not needed.
- These settings affect all users who have permissions to receive reports and messages.
Twelfth: Lists
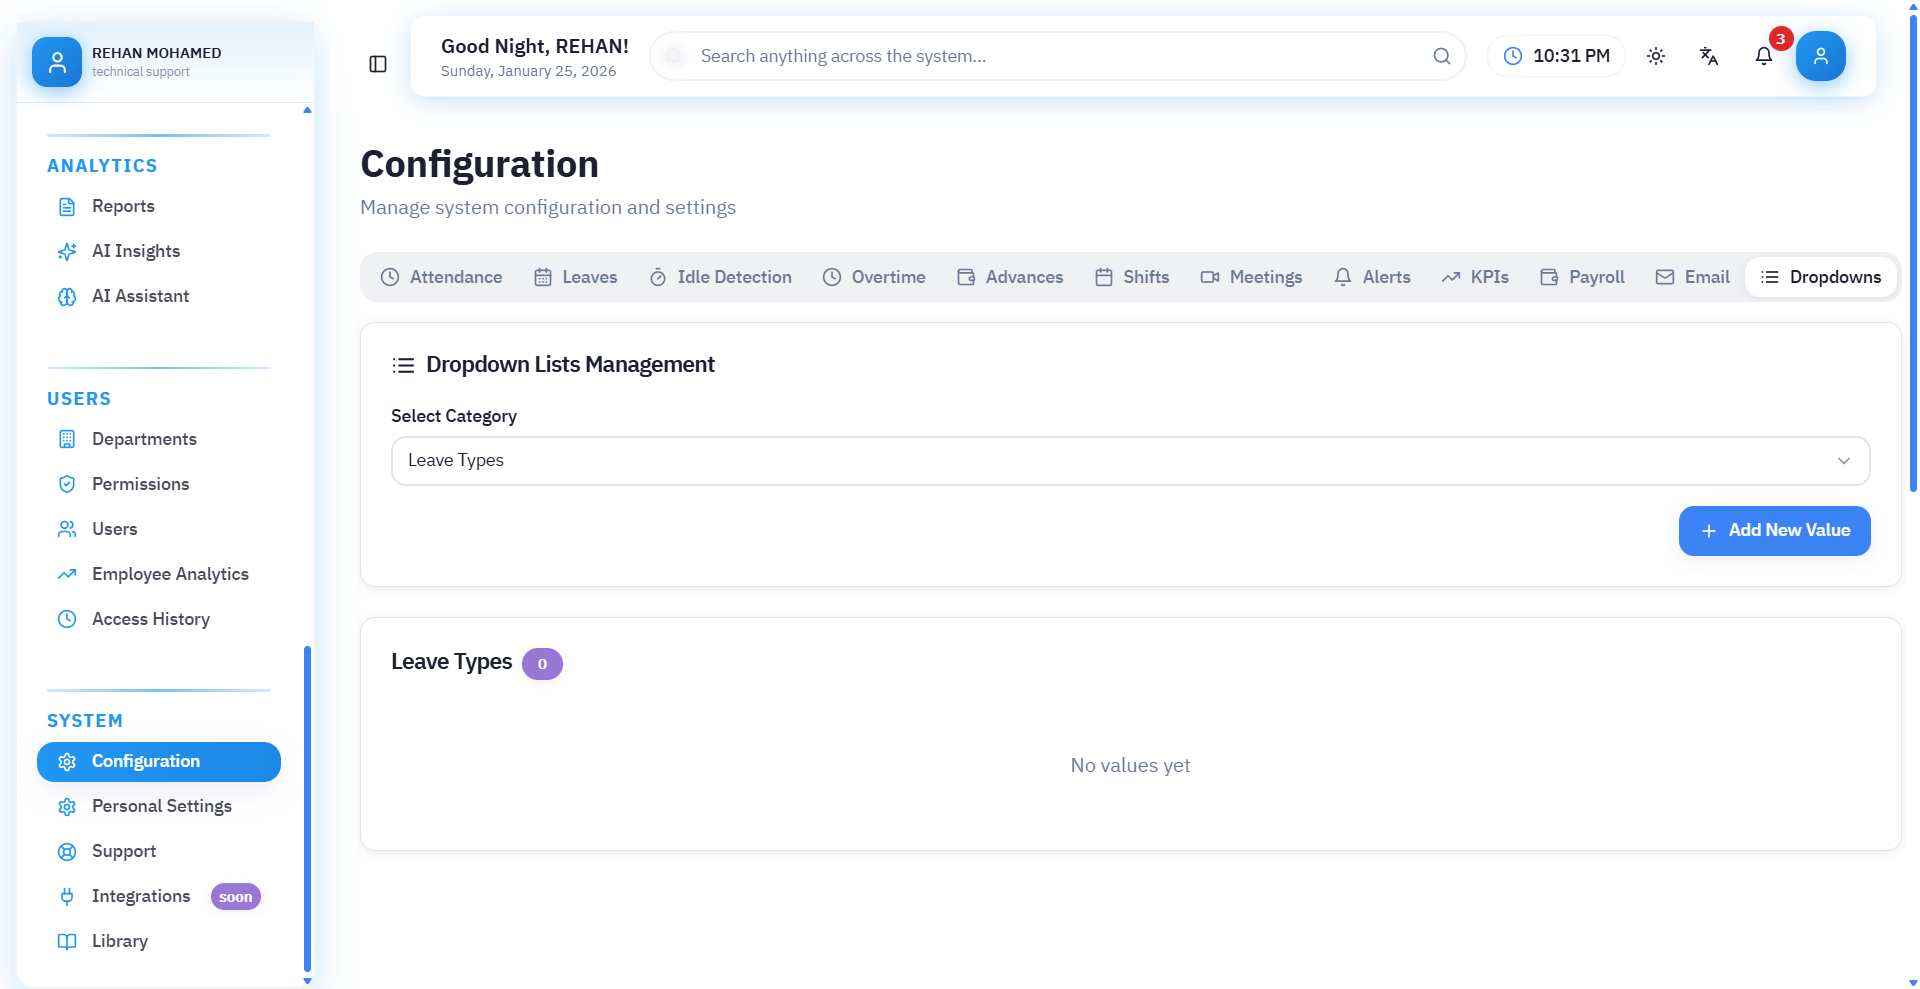
Dropdown Lists Page
Dropdown lists in the human resources system are used to manage basic values that many screens and processes within the system depend on.
Through this page, system administrator can add, modify, or delete values for the following elements:
- Leave types
- Request types
- Custody types
- Document types
- Currencies
- Shift types
- Questions (Surveys)
These values are considered an essential part of system configuration and customization according to each company's nature.
How to Use Dropdown Lists Page
1. Select Category
At the top of the page there is a dropdown titled "Select Category".
Through it, you choose the type of list you want to modify.
Category Examples:
- Leave types
- Request types
- Custody types
- Document types
- Currencies
- Shift types
- Questions (for surveys or forms)
Once category is selected, system displays all previously added values in an organized table.
2. Display Existing Values
After selecting category, a table appears containing:
- Order (to control appearance of elements in lists)
- Value – used within system
- Display Text (Label) – appears to users
- Color (optional for some categories like shifts or leave)
- Status (Enabled / Disabled)
- Actions (Edit – Delete)
This helps organize and arrange data according to company needs.
3. Add New Value
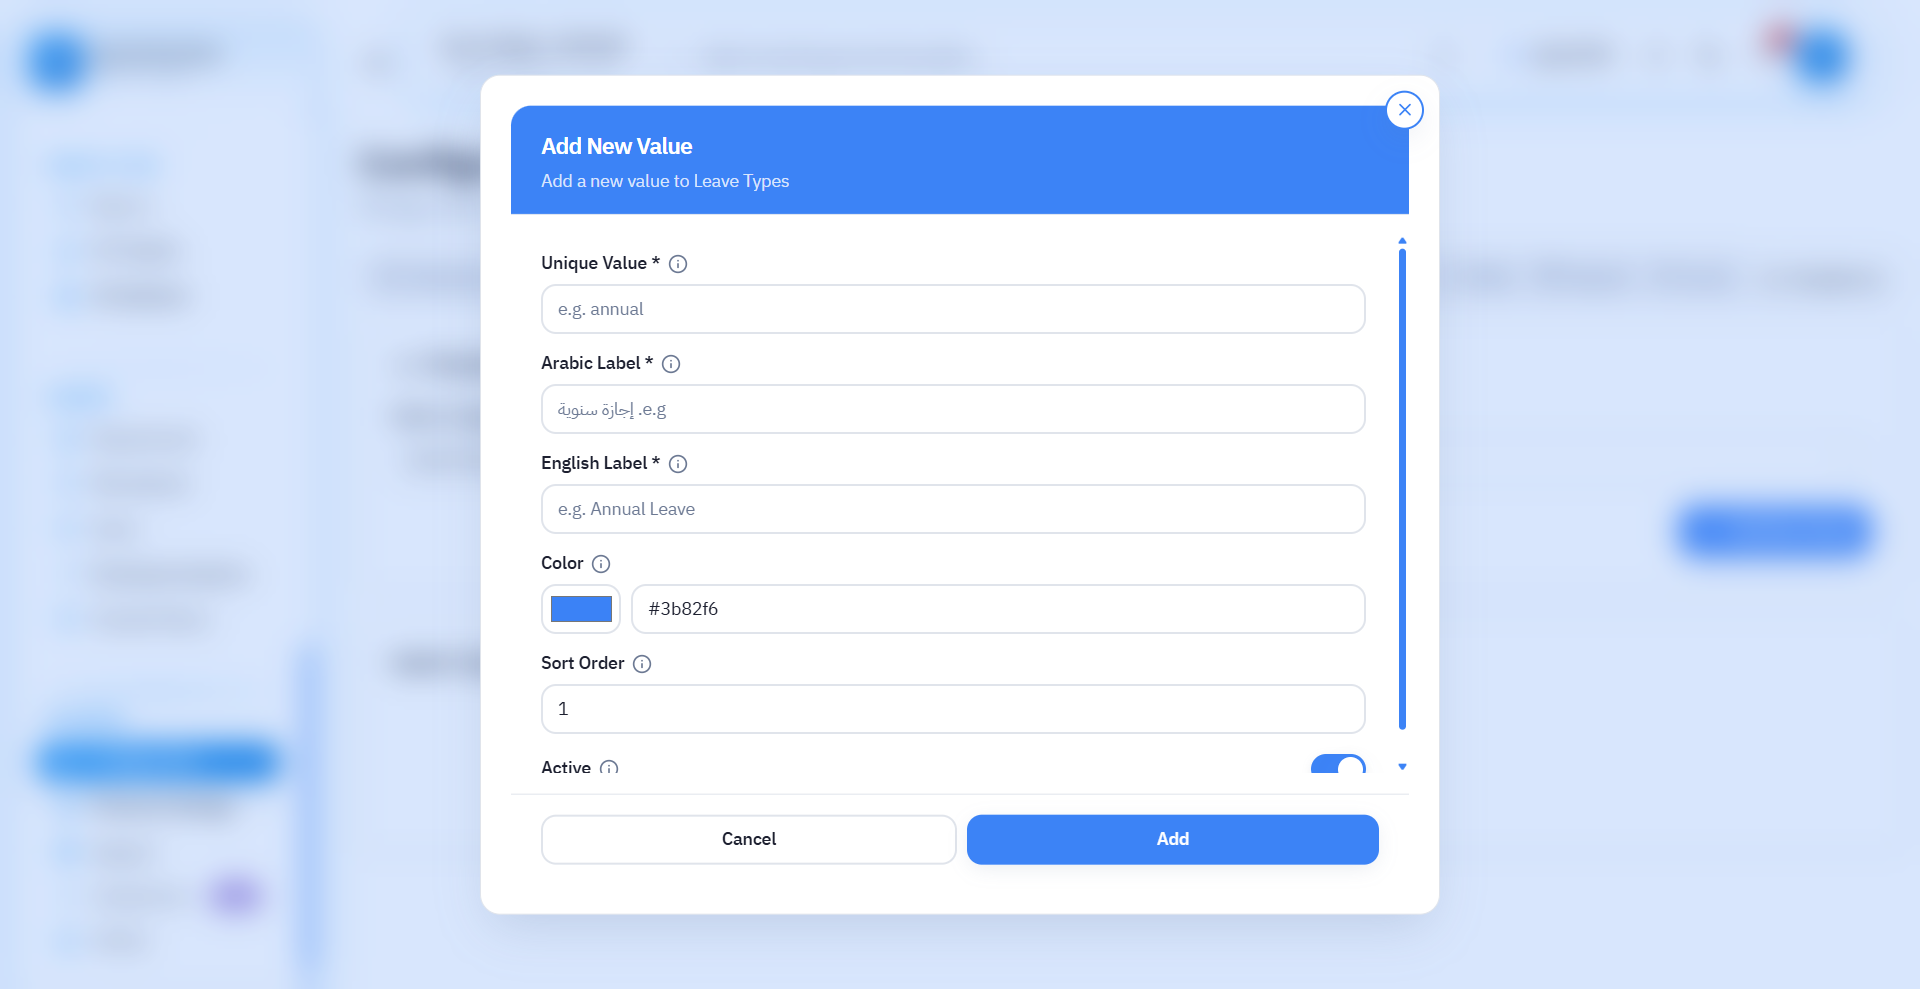
When "Add New Value" button is clicked, a form appears containing:
- Value: Internal name used by system – usually written in English.
- Display Text (Label): Name visible to users – usually written in Arabic.
- Color (Optional): Used to visually distinguish element (such as leave type or shift color).
- Order: To determine order of value appearance in list.
- Status: Enable or disable value without deleting it.
After filling data, click save to add value to list.
4. Modify or Delete Existing Value
- Modify: Done by clicking pencil icon ✏️
- Delete: Done by clicking X icon
Deletion system does not affect old data, but prevents using value in future.
Explanation of Each List Type
First: Leave Types
Through this list, leave types used within the company are defined such as:
- Annual leave
- Sick leave
- Emergency leave
- Permission
- Unpaid leave
- and more
Each company can customize the list according to its policy.
Second: Request Types
Used to define all types of requests created by employees such as:
- Permission request
- Advance request
- Data modification request
- Clearance request
- Housing allowance request
- and more
Third: Custody Types
Used to record company assets delivered to employees, such as:
- Laptop
- Phone
- SIM card
- Biometric device
- and more
Fourth: Document Types
Appear when uploading files such as:
- ID card
- Passport
- Birth certificate
- License
- Employment contract
Fifth: Currencies
Used to determine currencies available in salaries and allowances such as:
- SAR
- EGP
- AED
- USD
- KWD
- and more
Sixth: Shift Types
Used to create shift system within company such as:
- Morning shift
- Evening shift
- Night shift
- Flexible shift
- Split shift
Each shift can specify:
- Text
- Value
- Color
- Order
Seventh: Questions (Surveys)
Used to create custom questions for employee surveys or performance forms.
You can add:
- Text question
- Multiple choice question
- Star rating
- Notes
Summary
The dropdown lists page is the core of system configuration and customization to match each company's nature.
Through it, you can control all static data that the system depends on in:
- ✔ Leave
- ✔ Requests
- ✔ Shifts
- ✔ Payroll
- ✔ Custody
- ✔ Documents
- ✔ Surveys
The system allows complete management (add – modify – delete – disable) easily without needing any technical settings.
Summary
The Configuration & Settings page is the foundation on which the system builds all its operations. By configuring these settings correctly, the company ensures the system works according to its internal policies and calculates all operations accurately.
We recommend reviewing all configuration and settings with the human resources team before starting to use the system in practice, and ensuring they match the officially adopted policies in the company.